
Youtube videos, whether these are classical on-demand videos or live-stream videos, can also be watched inside Kodi. The video source plugin "Youtube", an official Kodi plugin, can be used for this purpose.
However Google has restricted non-authenticated access to Youtube videos a while ago. This means: Without authentication, this video plugin will not be able to work. It will fail at the "Sign in" step. The plugin will notify you, that you need to configure API access first.
So does this mean, one needs to enter the personal Google login? Kind of. Basically the login will be based on your own Google login, but unfortunately it's more complex. You will need to create a Google Developer API Key and additional Oauth2 credentials (client key and secret key) in order to log in.
The best description for this can be found on the Personal API Keys wiki page of the Youtube plugin.It explains all the steps below in a video.
First you need to sign in into the Google API console, using your own Google account.
Create a new project. Give that project any name. I simply called it "Kodi".
On the dashboard of this new project, click on [ENABLE APIS AND SERVICES]. This will open an API library. Scroll down (or search) until you find the YouTube Data API v3:

Click on YouTube Data API v3 and then enable this API. This will get you back into the dashboard of the GoogleAPIs console from before.
In the left navigation, click on Credentials. Then on top of the page click on the [+CREATE CREDENTIALS] button.
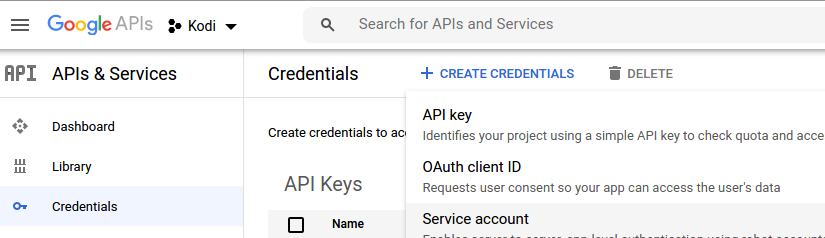
A drop down menu offers three choices: API key, OAuth client ID and Service account. In order to grant Kodi access to Youtube, an API key and OAuth credentials (client ID and secret) need to be created.
Click on [API key] to create a new API key. The key should be promply generated and shown to you.
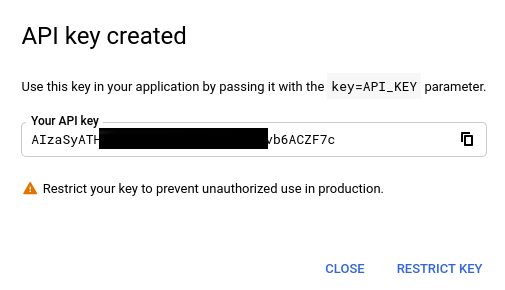
Note the yellow/orange warning sign. We'll come back to that later.
Next thing to do is to configure the OAuth consent screen. This needs to be done before the OAuth 2 credentials (or you will get a message saying this). In the left navigation, click on [OAuth consent screen]. Enter the app name (here I used Kodi) and a support e-mail (your own Google account address) and at the end of the form, click on [Save and Continue].
Now finally OAuth2 credentials can be created. Click on [+CREATE CREDENTIALS] once again, then on [OAuth client ID].
A form will show up, asking your for the application type. For a device such as Kodi select [TVs and Limited Input devices], and give the client a name. I gave it the name "Kodi Office" as I have two Kodi devices in my home.

Click on [CREATE] and you should receive the client id and the client secret immediately:
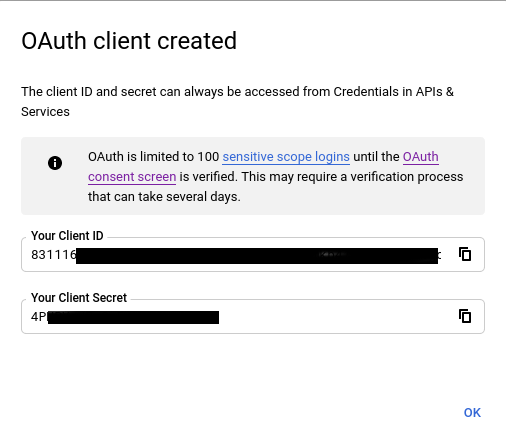
Copy the Client ID and the Client Secret, they will be needed in Kodi.
That's it for the API preparation.
In Kodi, navigate to Addons -> Video add-ons and select the YouTube add-on. Go into [Settings] of this add-on.
In the left navigation, select [API] and on the right side select [Enable API configuration page].
This will launch a HTTP listener on the Kodi device, listening on port 50152.
In a browser, enter the following URL: http://KODI-IP-ADDRESS:50152/api where KODI-IP-ADDRESS is of course the ip address of your Kodi device. This will show a form called YouTube Add-on API Configuration:

Enter the API key which you copy from the Credentials overview of the GoogleAPI console.
API Id and API Secret can be found by opening (editing) the OAuth 2 Client ID:

Enter Client ID and Client secret into the form fields and click on [Save].
To be save, restart Kodi afterwards.
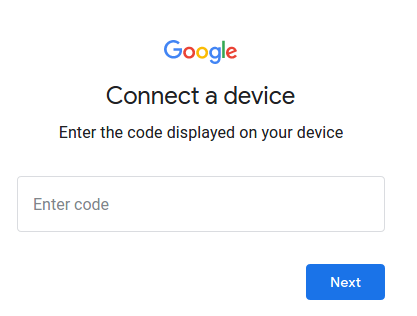
Launch the Youtube add-on in Kodi and select [Sign In]. The plugin should now use the API credentials in the background and then display a code, which needs to be entered on google.com/device.
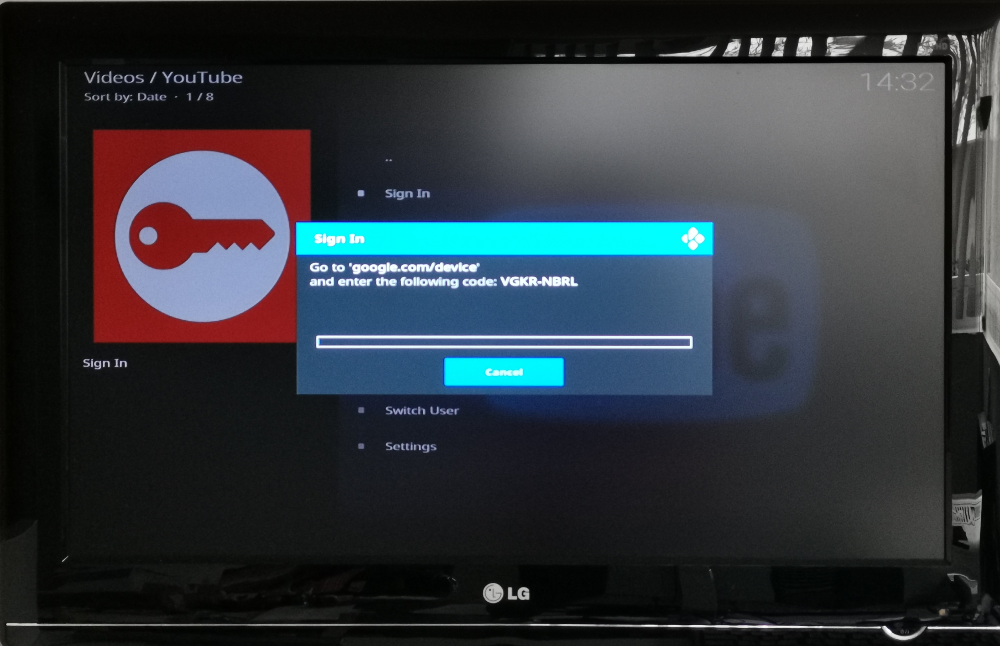
You can use a separate device or a computer to do this in a browser. Enter the code, shown in Kodi and click on Next.
Afterwards, you need to grant access to the device (Kodi) to Youtube, by clicking on Allow. This could look like this window:
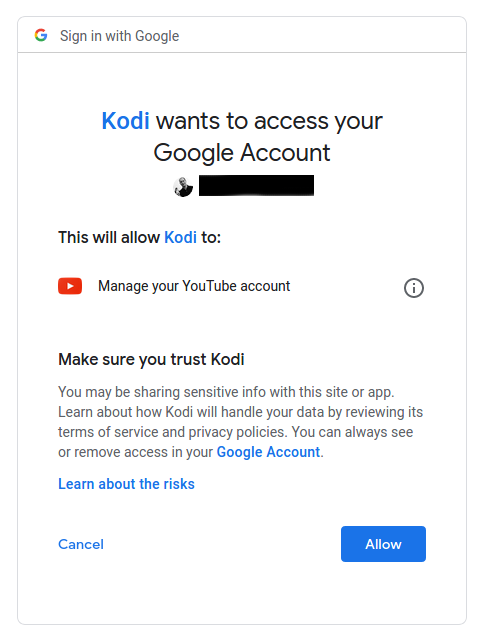
Then the same happens again: Kodi will display another code, which needs once more entered on google.com/device. The second approval should be enough to finally use the Youtube add-on on Kodi.
It is possible that you get a 403 error from Google on the second authentication attempts, looking like this:
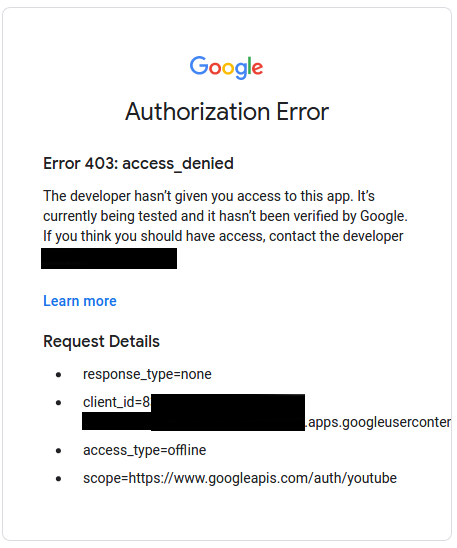
In this case you need to re-configure the API key, created in the first step. Remember the yellow/orange warning sign? The 403 error is related to this.
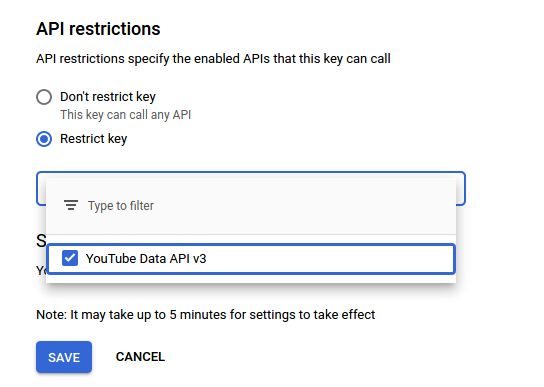
In this case, edit the API key and restrict the API key to a single API. In this case the Youtube API:
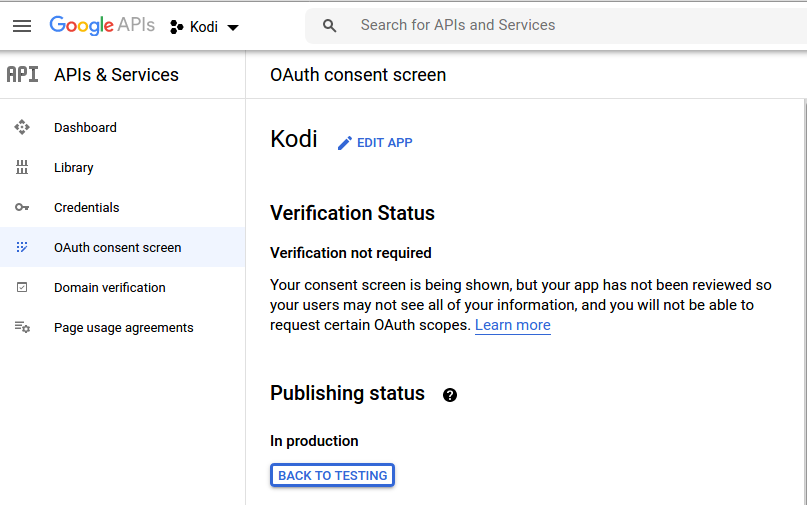
Furthermore you might have to change the publishing status of the OAuth consent screen to production. By default the status is set to Testing:

Once clicked on [Publish App], the status should change to Production:
Now proceed with the sign-in procedure on Kodi again.
After you've entered the second code, you should get a different response in browser (Google hasn't verified this app):
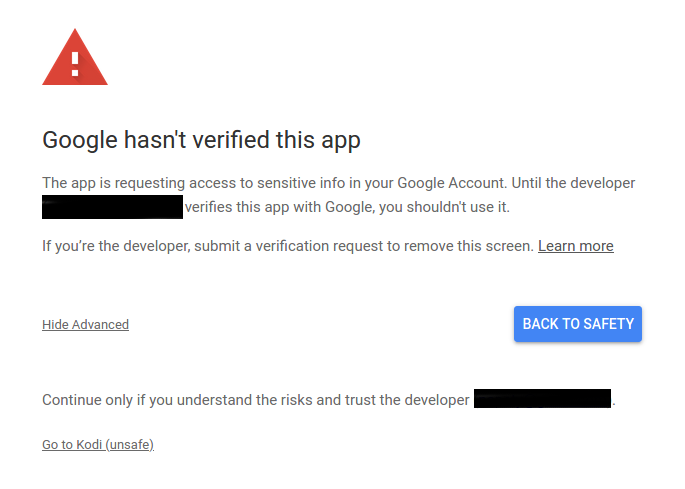
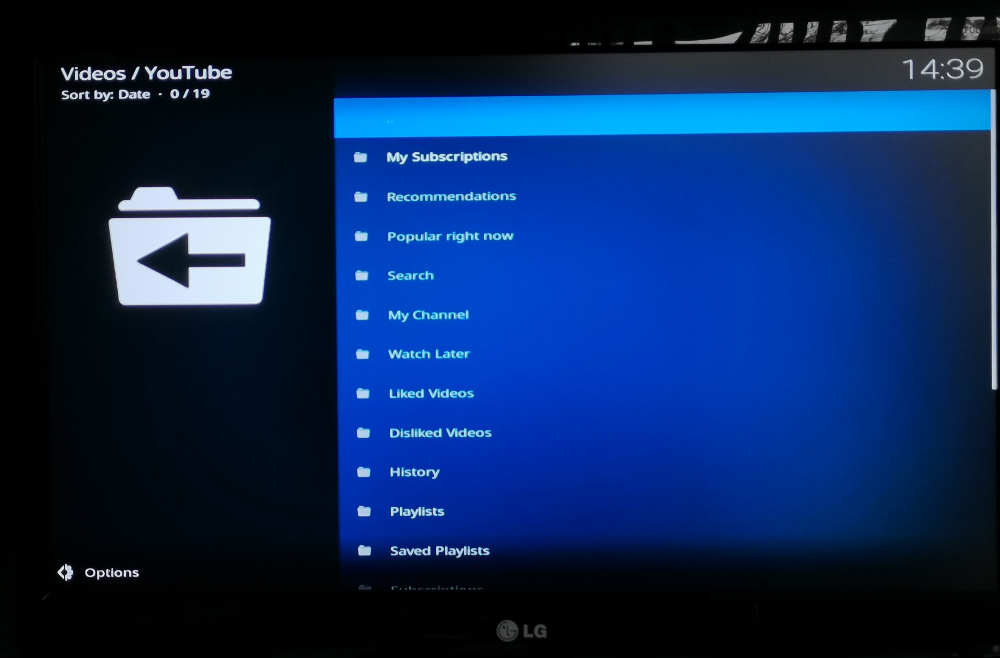
Click on Advanced and then click on [Go to Kodi (unsafe)] and finally the Youtube add-on is able to sign in and you'll be able to play Youtube videos on Kodi!
SD from wrote on Sep 27th, 2023:
Claudio,
Thanks for the article. I would note though that this is NOT overall secure.
You are right about the API key (and restricting it to youtube API only) but instead of allowing anyone access by publishing the app, you could instead go to the same Oauth screen and add your own email (that is used all over the project) to the "Test Users" portion.
This would then allow *only* your email to authenticate to this project.
Otherwise, thanks again!
B Taylor from wrote on Aug 16th, 2023:
Finally a tutorial that actually works and knows about the various errors and how to fix them. Claudio, you are a champion sir. Thank You.
Uwe from wrote on May 23rd, 2023:
Hi Claudio,
thank you very much for the great documentation. All worked fine. But I had to try twice, cause I wasn't patient enough after changing the state of my API key to production ! My bad :-)
Matt T from United Kingdom wrote on Apr 23rd, 2022:
Amazing! thanks. I would never have got YouTube working without this guide. Thanks for taking the time to upload.
Roy from wrote on Apr 4th, 2022:
I truly appreciate the help. I was stuck and helpless until I found this.
Pete from UK wrote on Mar 14th, 2022:
Great, thank you for this. I had the same problem as the other comment - 403 error etc. This fixed it. Thank you!
Jan from wrote on May 16th, 2021:
Thank you very much, this was the additional information i needed, basic configuration hints didn't worked for me, always had error 403. I needed to both restrict api key to use on single api and to puplish the project.

AWS Android Ansible Apache Apple Atlassian BSD Backup Bash Bluecoat CMS Chef Cloud Coding Consul Containers CouchDB DB DNS Database Databases Docker ELK Elasticsearch Filebeat FreeBSD Galera Git GlusterFS Grafana Graphics HAProxy HTML Hacks Hardware Icinga Icingaweb Icingaweb2 Influx Internet Java KVM Kibana Kodi Kubernetes LVM LXC Linux Logstash Mac Macintosh Mail MariaDB Minio MongoDB Monitoring Multimedia MySQL NFS Nagios Network Nginx OSSEC OTRS Office PGSQL PHP Perl Personal PostgreSQL Postgres PowerDNS Proxmox Proxy Python Rancher Rant Redis Roundcube SSL Samba Seafile Security Shell SmartOS Solaris Surveillance Systemd TLS Tomcat Ubuntu Unix VMWare VMware Varnish Virtualization Windows Wireless Wordpress Wyse ZFS Zoneminder