
Solaris and hard drive maintenance tasks.. Oh joy! I've already written articles about it (Solaris: Add a new hard drive to existing zfs pool (with hpacucli) and Solaris: Replace defect HDD with hpacucli and zpool). Both articles were based on Solaris running on HP Proliant servers.
Now I had to replace a defect hard drive on an IBM x3650 server, running with Solaris 10. Different hardware - different story.
First of all: The IBM server and its RSA II did not detect the failed disk. The defect disk was detected by the Nagios plugin check_zpools.sh to monitor the health and usage of ZFS pools.
zpool status showed the following output:
(solaris91
pool: rpool
state: DEGRADED
status: One or more devices could not be opened. Sufficient replicas exist for
the pool to continue functioning in a degraded state.
action: Attach the missing device and online it using 'zpool online'.
see: http://www.sun.com/msg/ZFS-8000-2Q
scrub: none requested
config:
NAME STATE READ WRITE CKSUM
rpool DEGRADED 0 0 0
mirror DEGRADED 0 0 0
c0t0d0s0 ONLINE 0 0 0
c0t1d0s0 UNAVAIL 0 0 0 cannot open
errors: No known data errors
pool: zonepool
state: ONLINE
scrub: none requested
config:
NAME STATE READ WRITE CKSUM
zonepool ONLINE 0 0 0
mirror ONLINE 0 0 0
c0t2d0s0 ONLINE 0 0 0
c0t3d0s0 ONLINE 0 0 0
On the HP servers, the physical disks had to be replaced and then activated by hpacucli, the HP command line utility for the raid controller. Like HP has its hpacucli command line utility, there is arcconf for Adaptec raid controllers.
arcconf can be downloaded from the Adaptec website. I downloaded and installed (well, unzipped) arcconf v. 1_2_20532 from http://www.adaptec.com/en-us/speed/raid/storage_manager/arcconf_v1_2_20532_zip.htm .
(solaris91 ) 0 # unzip arcconf_v1_2_20532.zip
(solaris91 ) 0 # cd solaris_x86
(solaris91
That's it. You can launch arcconf directly from the unzipped folder as executable.
Before doing anything, the raid controller needs to be scanned:
(solaris91
Controllers found: 1
Rescan started in the background and can take upto 10 mins to complete.
Command completed successfully.
Then the status of the physical disks can be displayed (I've cut unnecessary information from the output):
(solaris91
Controllers found: 1
----------------------------------------------------------------------
Physical Device information
----------------------------------------------------------------------
Device #0
Device is a Hard drive
State : Online
Supported : Yes
Transfer Speed : SAS 3.0 Gb/s
Reported Channel,Device(T:L) : 0,0(0:0)
Reported Location : Enclosure 0, Slot 0
Reported ESD(T:L) : 2,0(0:0)
Vendor : IBM-ESXS
Model : ST973451SS
Total Size : 70006 MB
Device #1
Device is a Hard drive
State : Online
Supported : Yes
Transfer Speed : SAS 3.0 Gb/s
Reported Channel,Device(T:L) : 0,2(2:0)
Reported Location : Enclosure 0, Slot 2
Reported ESD(T:L) : 2,0(0:0)
Vendor : IBM-ESXS
Model : CBRBA146C3ETS0 N
Total Size : 140013 MB
Device #2
Device is a Hard drive
State : Online
Supported : Yes
Transfer Speed : SAS 3.0 Gb/s
Reported Channel,Device(T:L) : 0,3(3:0)
Reported Location : Enclosure 0, Slot 3
Reported ESD(T:L) : 2,0(0:0)
Vendor : IBM-ESXS
Model : CBRBA146C3ETS0 N
Total Size : 140013 MB
Device #3
Device is an Enclosure services device
Reported Channel,Device(T:L) : 2,0(0:0)
Enclosure ID : 0
Type : SES2
Vendor : IBM-ESXS
Model : VSC7160
Firmware : 1.07
Status of Enclosure services device
Speaker status : Not available
Well - interesting. There are only three devices/disks (plus the enclosure) shown in the output. The defect disk seems to be missing (note the row 'Reported Channel, Device').
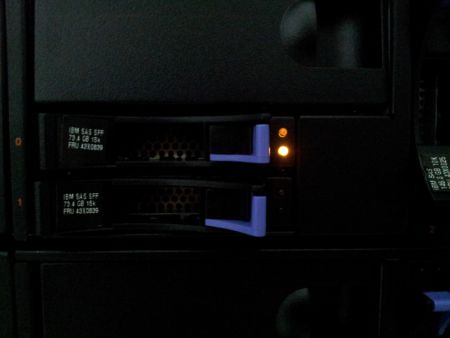
So far I have the following information: The defect disk is in zpool "rpool" and its size is 70GB. The problem: There are two disks like that and the server did not detect the failed disk as failed - no LED light indicates the bad disk for me.
Well, arcconf can help here, too. I can identify the working disk by letting its LED blink:
(solaris91
Controllers found: 1
Only devices managed by an enclosure processor may be identified
The specified device is blinking.
Press any key to stop the blinking.
It was easy to detect the failed disk once the working one was blinking:
Once I replaced the failed disk, I relaunched arcconf to see the current state of the disks (once again I removed unnecessary information):
(solaris91
Controllers found: 1
----------------------------------------------------------------------
Physical Device information
----------------------------------------------------------------------
Device #0
State : Online
Supported : Yes
Transfer Speed : SAS 3.0 Gb/s
Reported Channel,Device(T:L) : 0,0(0:0)
Device #1
State : Ready
Supported : Yes
Transfer Speed : SAS 3.0 Gb/s
Reported Channel,Device(T:L) : 0,1(1:0)
Device #2
State : Online
Supported : Yes
Transfer Speed : SAS 3.0 Gb/s
Reported Channel,Device(T:L) : 0,2(2:0)
Device #3
State : Online
Supported : Yes
Transfer Speed : SAS 3.0 Gb/s
Reported Channel,Device(T:L) : 0,3(3:0)
So finally there are 4 disks detected. But the new disk's state is READY and not ONLINE as the others. To bring the device/disk online, a logical drive/simple volume needs to be created. Remember that zfs is handling raid on this server and not the hardware raid controller. The arcconf help shows how to do it:
(solaris91
Usage: CREATE
So what I need to do is to use CREATE with the controller number (1), LOGICALDRIVE, the size (max), the raid type (volume) and the channel id, which can be seen in the "pd" output above (0,1):
(solaris91
Controllers found: 1
Do you want to add a logical device to the configuration?
Press y, then ENTER to continue or press ENTER to abort: y
Creating logical device: LogicalDrv 1
Command completed successfully.
The created logical device can be verified:
solaris91
Controllers found: 1
----------------------------------------------------------------------
Logical device information
----------------------------------------------------------------------
Logical device number 0
Logical device name : disk0
RAID level : Simple_volume
Status of logical device : Optimal
Size : 69890 MB
Logical device number 1
Logical device name : LogicalDrv 1
RAID level : Simple_volume
Status of logical device : Optimal
Size : 69889 MB
Logical device number 2
Logical device name : disk2
RAID level : Simple_volume
Status of logical device : Optimal
Size : 139890 MB
Logical device number 3
Logical device name : disk3
RAID level : Simple_volume
Status of logical device : Optimal
Size : 139890 MB
Well... the logical device was created (LogicalDrv 1) but the others are called a bit differently. No problem, arcconf can rename the logical device:
(solaris91
Controllers found: 1
Command completed successfully.
Let's check again the state of the physical disks:
(solaris91
Controllers found: 1
----------------------------------------------------------------------
Physical Device information
----------------------------------------------------------------------
Device #0
State : Online
Device #1
State : Online
Device #2
State : Online
Device #3
State : Online
Now we come to the Solaris/ZFS stuff to replace the physical disk in the operating system. First the new disk needs to be Solaris-formatted:
(solaris91
Searching for disks...done
AVAILABLE DISK SELECTIONS:
0. c0t0d0
/pci@0,0/pci8086,25e3@3/pci1014,9580@0/sd@0,0
1. c0t1d0
/pci@0,0/pci8086,25e3@3/pci1014,9580@0/sd@1,0
2. c0t2d0
/pci@0,0/pci8086,25e3@3/pci1014,9580@0/sd@2,0
3. c0t3d0
/pci@0,0/pci8086,25e3@3/pci1014,9580@0/sd@3,0
Specify disk (enter its number): 1
selecting c0t1d0
[disk formatted]
FORMAT MENU:
disk - select a disk
type - select (define) a disk type
partition - select (define) a partition table
current - describe the current disk
format - format and analyze the disk
fdisk - run the fdisk program
repair - repair a defective sector
label - write label to the disk
analyze - surface analysis
defect - defect list management
backup - search for backup labels
verify - read and display labels
save - save new disk/partition definitions
inquiry - show vendor, product and revision
volname - set 8-character volume name
!
quit
format> fdisk
No fdisk table exists. The default partition for the disk is:
a 100% "SOLARIS System" partition
Type "y" to accept the default partition, otherwise type "n" to edit the
partition table.
y
format> quit
We could use format to create the partition table of the new disk, too, but in this case it is much easier to copy the VTOC (Volume Table of Contents) from the existing disk (c0t0d0):
(solaris91
fmthard: New volume table of contents now in place.
Now that the physical disk was replaced, formatted and partitioned, we can replace it in the zpool:
(solaris91
The zpool status output now shows the resilvering (= raid resynchro) of the disks in rpool:
(solaris91
pool: rpool
state: DEGRADED
status: One or more devices is currently being resilvered. The pool will
continue to function, possibly in a degraded state.
action: Wait for the resilver to complete.
scrub: resilver in progress for 0h0m, 1.62% done, 0h5m to go
config:
NAME STATE READ WRITE CKSUM
rpool DEGRADED 0 0 0
mirror DEGRADED 0 0 0
c0t0d0s0 ONLINE 0 0 0
replacing DEGRADED 0 0 0
c0t1d0s0/old FAULTED 0 0 0 corrupted data
c0t1d0s0 ONLINE 0 0 0
And that's it. Oh joy!
No comments yet.

AI AWS Android Ansible Apache Apple Atlassian BSD Backup Bash Bluecoat CMS Chef Cloud Coding Consul Containers CouchDB DB DNS Databases Docker ELK Elasticsearch Filebeat FreeBSD Galera Git GlusterFS Grafana Graphics HAProxy HTML Hacks Hardware Icinga Influx Internet Java KVM Kibana Kodi Kubernetes LVM LXC Linux Logstash Mac Macintosh Mail MariaDB Minio MongoDB Monitoring Multimedia MySQL NFS Nagios Network Nginx OSSEC OTRS Observability Office OpenSearch PHP Perl Personal PostgreSQL PowerDNS Proxmox Proxy Python Rancher Rant Redis Roundcube SSL Samba Seafile Security Shell SmartOS Solaris Surveillance Systemd TLS Tomcat Ubuntu Unix VMware Varnish Virtualization Windows Wireless Wordpress Wyse ZFS Znuny Zoneminder