
For a new project I bought a Raspberry Pi Zero WH (W = Wireless, H = Headers) together with a ReSpeaker multi-microphone.
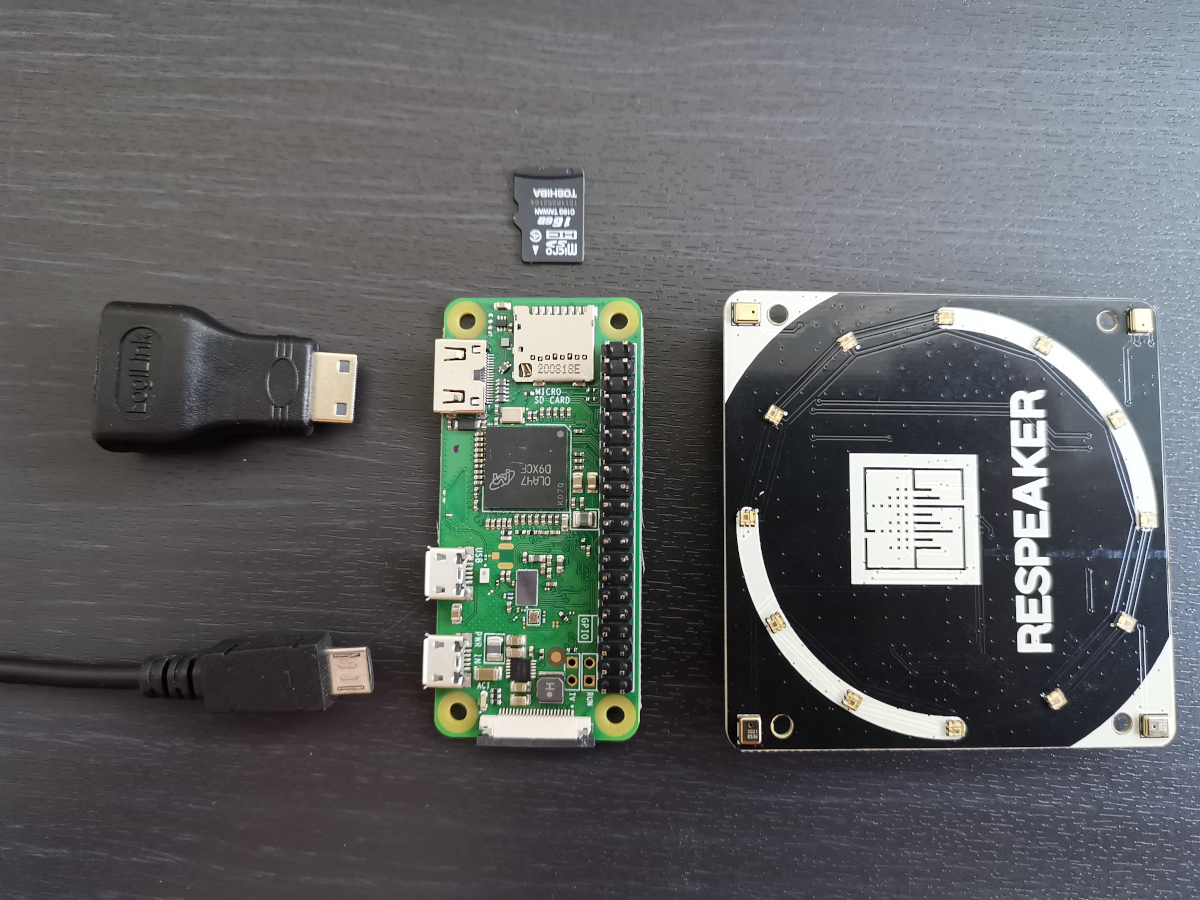
This was the first time I ever had a Pi Zero in the hands. I've had a Raspberry Pi 2 and 3b+ before and kind of got used to the onboard USB ports. Even though this is clearly documented, I only realized now that I don't have any USB-to-microUSB adapters - therefore no way to attach a mouse or keyboard to the Pi Zero.
After I installed Raspberry Pi OS (Raspbian) on the microSD card (using the Raspberry Pi Imager) I verified that the Pi Zero actually boots. I had a HDMI-to-miniHDMI adapter available (see photo above) so I was able to verify the boot on the screen.
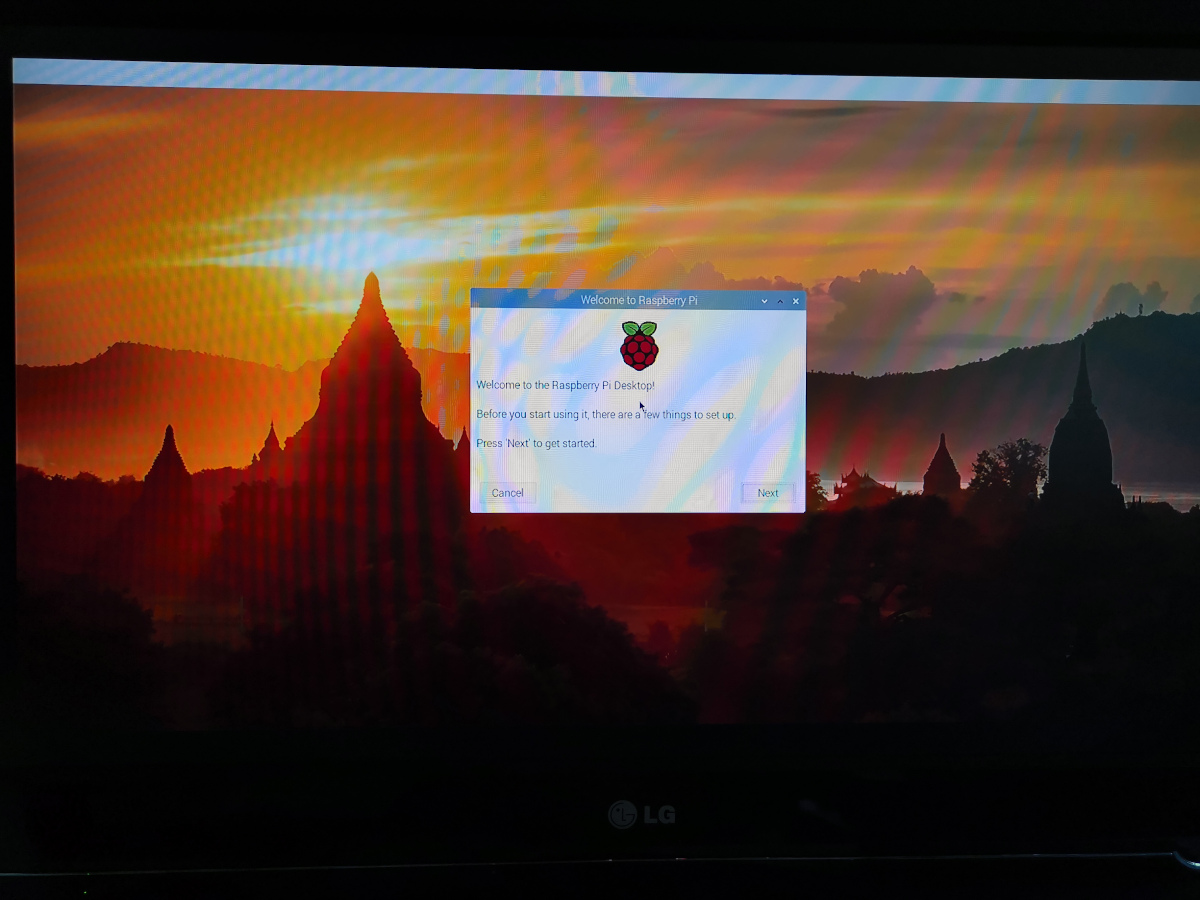
Yep, the Pi Zero correctly booted correctly. But how would I be able to log in to the Pi, configure WLAN and install the needed software without a keyboard?
To solve this, the Pi Zero (or basically any Raspberry Pi) can be told to automatically:
at boot time.
The trick is to manually place the relevant files into the Pi's boot partition.
Note: The microSD card is formatted in a way that two partitions exist. Partition 1 is the boot partition; it holds the Kernel, drivers and other information needed to boot the system. Partition 2 contains all other data, including the Operating System and user data (/home/pi).
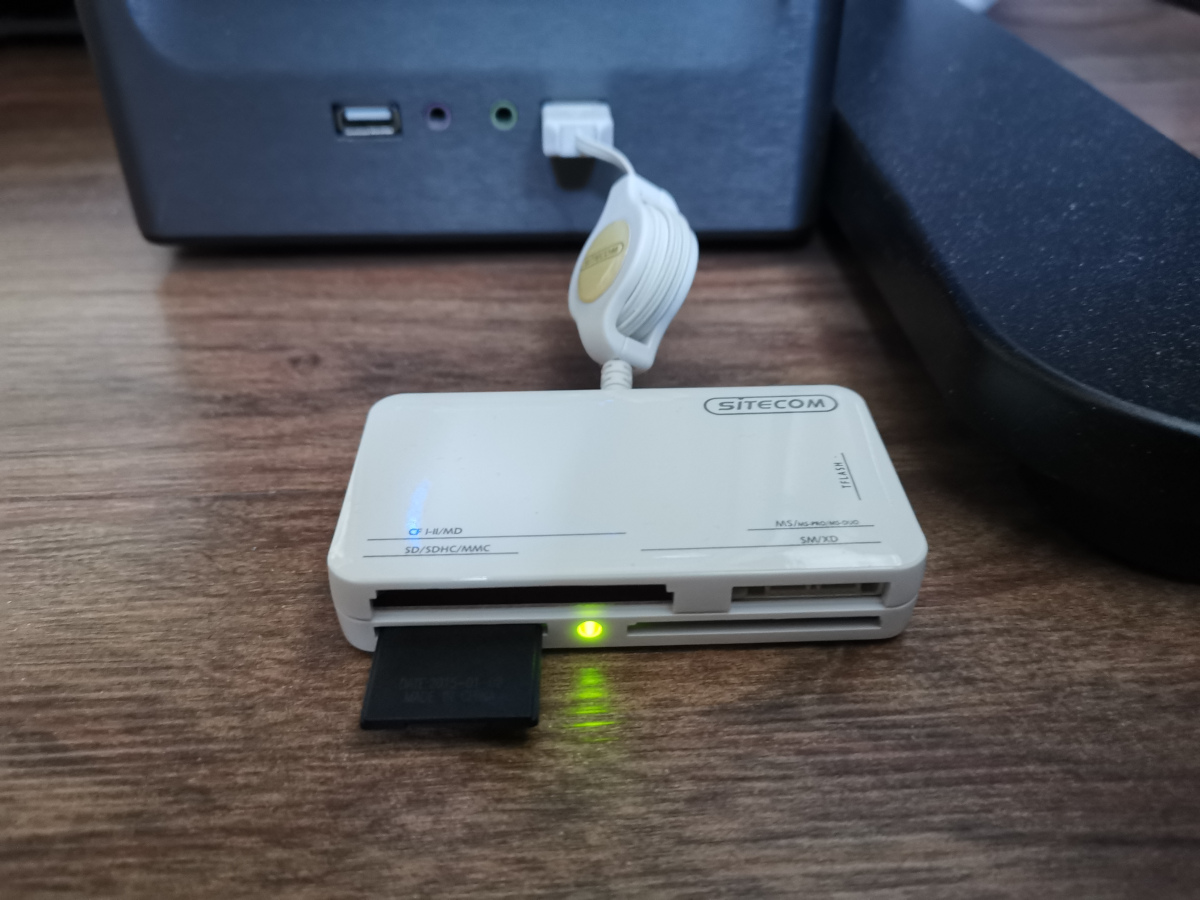
To do that, I turned off the power of the Pi Zero, removed the microSD card and connected it to my computer (using a microSD-to-SD adapter and then using a card reader):
In my own OS (Linux Mint) I could see that the card reader was detected and the SD card seen as sdf:
ck@mintp ~ $ dmesg
[...]
[698910.390989] usb 1-7.1: new high-speed USB device number 5 using xhci_hcd
[698910.979313] usb 1-7.1: New USB device found, idVendor=0bda, idProduct=0151, bcdDevice=51.95
[698910.979315] usb 1-7.1: New USB device strings: Mfr=1, Product=2, SerialNumber=3
[698910.979318] usb 1-7.1: Product: USB2.0-CRW
[698910.979319] usb 1-7.1: Manufacturer: Generic
[698910.979321] usb 1-7.1: SerialNumber: 20060413092100000
[698910.999520] usb-storage 1-7.1:1.0: USB Mass Storage device detected
[698910.999629] scsi host6: usb-storage 1-7.1:1.0
[698912.039413] scsi 6:0:0:0: Direct-Access Generic- Compact Flash 1.00 PQ: 0 ANSI: 0 CCS
[698912.045563] scsi 6:0:0:1: Direct-Access Generic- SM/xD-Picture 1.00 PQ: 0 ANSI: 0 CCS
[698912.051680] scsi 6:0:0:2: Direct-Access Generic- SD/MMC 1.00 PQ: 0 ANSI: 0 CCS
[698912.057815] scsi 6:0:0:3: Direct-Access Generic- MS/MS-Pro 1.00 PQ: 0 ANSI: 0 CCS
[698912.058090] sd 6:0:0:0: Attached scsi generic sg3 type 0
[698912.058273] sd 6:0:0:1: Attached scsi generic sg4 type 0
[698912.058467] sd 6:0:0:2: Attached scsi generic sg5 type 0
[698912.058614] sd 6:0:0:3: Attached scsi generic sg6 type 0
[698912.152729] usb 1-7.1: reset high-speed USB device number 5 using xhci_hcd
[698912.392881] usb 1-7.1: reset high-speed USB device number 5 using xhci_hcd
[698912.636537] usb 1-7.1: reset high-speed USB device number 5 using xhci_hcd
[698912.880849] usb 1-7.1: reset high-speed USB device number 5 using xhci_hcd
[698913.124734] usb 1-7.1: reset high-speed USB device number 5 using xhci_hcd
[698913.368804] usb 1-7.1: reset high-speed USB device number 5 using xhci_hcd
[698913.501135] sd 6:0:0:1: [sde] 0 512-byte logical blocks: (0 B/0 B)
[698913.501138] sd 6:0:0:1: [sde] 0-byte physical blocks
[698914.170576] sd 6:0:0:2: [sdf] 30367744 512-byte logical blocks: (15.5 GB/14.5 GiB)
[698914.170891] sd 6:0:0:1: [sde] Test WP failed, assume Write Enabled
[698914.171208] sd 6:0:0:1: [sde] Asking for cache data failed
[698914.171212] sd 6:0:0:1: [sde] Assuming drive cache: write through
[698914.171508] sd 6:0:0:0: [sdd] Attached SCSI removable disk
[698914.173131] sd 6:0:0:2: [sdf] Write Protect is off
[698914.173134] sd 6:0:0:2: [sdf] Mode Sense: 03 00 00 00
[698914.175126] sd 6:0:0:2: [sdf] No Caching mode page found
[698914.175129] sd 6:0:0:2: [sdf] Assuming drive cache: write through
[698914.187861] sd 6:0:0:3: [sdg] Attached SCSI removable disk
[698914.188411] sd 6:0:0:1: [sde] Attached SCSI removable disk
[698914.212110] sdf: sdf1 sdf2
[698914.216123] sd 6:0:0:2: [sdf] Attached SCSI removable disk
The two partitions can be seen easily using fdisk:
ck@mintp ~ $ sudo fdisk -l /dev/sdf
[sudo] password for ck:
Disk /dev/sdf: 14.49 GiB, 15548284928 bytes, 30367744 sectors
Disk model: SD/MMC
Units: sectors of 1 * 512 = 512 bytes
Sector size (logical/physical): 512 bytes / 512 bytes
I/O size (minimum/optimal): 512 bytes / 512 bytes
Disklabel type: dos
Disk identifier: 0x1443eb9a
Device Boot Start End Sectors Size Id Type
/dev/sdf1 8192 532479 524288 256M c W95 FAT32 (LBA)
/dev/sdf2 532480 30367743 29835264 14.2G 83 Linux
The mentioned boot partition is the first partition and is formatted as FAT32. FAT32 is a "global" file system format which is accepted by the major Operating Systems (Windows, macOS and Linux - even BSD, too) and should not cause a problem to mount the partition and take a look into the filesystem:
ck@mintp ~ $ sudo mount /dev/sdf1 /mnt
ck@mintp ~ $ ll /mnt
total 48178
drwxr-xr-x 3 root root 3584 Jan 1 1970 ./
drwxr-xr-x 25 root root 4096 Mar 11 13:06 ../
-rwxr-xr-x 1 root root 25607 Mar 3 14:40 bcm2708-rpi-b.dtb*
-rwxr-xr-x 1 root root 25870 Mar 3 14:40 bcm2708-rpi-b-plus.dtb*
-rwxr-xr-x 1 root root 25218 Mar 3 14:40 bcm2708-rpi-b-rev1.dtb*
-rwxr-xr-x 1 root root 25529 Mar 3 14:40 bcm2708-rpi-cm.dtb*
-rwxr-xr-x 1 root root 25352 Mar 3 14:40 bcm2708-rpi-zero.dtb*
-rwxr-xr-x 1 root root 26545 Mar 3 14:40 bcm2708-rpi-zero-w.dtb*
-rwxr-xr-x 1 root root 26745 Mar 3 14:40 bcm2709-rpi-2-b.dtb*
-rwxr-xr-x 1 root root 26894 Mar 3 14:40 bcm2710-rpi-2-b.dtb*
-rwxr-xr-x 1 root root 28392 Mar 3 14:40 bcm2710-rpi-3-b.dtb*
-rwxr-xr-x 1 root root 29011 Mar 3 14:40 bcm2710-rpi-3-b-plus.dtb*
-rwxr-xr-x 1 root root 26890 Mar 3 14:40 bcm2710-rpi-cm3.dtb*
-rwxr-xr-x 1 root root 48810 Apr 30 16:01 bcm2711-rpi-400.dtb*
-rwxr-xr-x 1 root root 49090 Mar 3 14:40 bcm2711-rpi-4-b.dtb*
-rwxr-xr-x 1 root root 49202 Mar 3 14:40 bcm2711-rpi-cm4.dtb*
-rwxr-xr-x 1 root root 52456 Jan 5 08:30 bootcode.bin*
-rwxr-xr-x 1 root root 166 Jan 1 1980 cmdline.txt*
-rwxr-xr-x 1 root root 1784 May 7 16:43 config.txt*
-rwxr-xr-x 1 root root 18693 Jan 5 08:30 COPYING.linux*
-rwxr-xr-x 1 root root 3191 Apr 30 16:01 fixup4cd.dat*
-rwxr-xr-x 1 root root 5446 Apr 30 16:01 fixup4.dat*
-rwxr-xr-x 1 root root 8454 Apr 30 16:01 fixup4db.dat*
-rwxr-xr-x 1 root root 8452 Apr 30 16:01 fixup4x.dat*
-rwxr-xr-x 1 root root 3191 Apr 30 16:01 fixup_cd.dat*
-rwxr-xr-x 1 root root 7314 Apr 30 16:01 fixup.dat*
-rwxr-xr-x 1 root root 10298 Apr 30 16:01 fixup_db.dat*
-rwxr-xr-x 1 root root 10298 Apr 30 16:01 fixup_x.dat*
-rwxr-xr-x 1 root root 145 May 7 17:07 issue.txt*
-rwxr-xr-x 1 root root 6320888 Apr 30 16:01 kernel7.img*
-rwxr-xr-x 1 root root 6694528 Apr 30 16:01 kernel7l.img*
-rwxr-xr-x 1 root root 7758283 Apr 30 16:01 kernel8.img*
-rwxr-xr-x 1 root root 5981944 Apr 30 16:01 kernel.img*
-rwxr-xr-x 1 root root 1594 Jan 5 08:30 LICENCE.broadcom*
drwxr-xr-x 2 root root 18432 May 7 16:42 overlays/
-rwxr-xr-x 1 root root 793084 Apr 30 16:01 start4cd.elf*
-rwxr-xr-x 1 root root 3722504 Apr 30 16:01 start4db.elf*
-rwxr-xr-x 1 root root 2228768 Apr 30 16:01 start4.elf*
-rwxr-xr-x 1 root root 2981160 Apr 30 16:01 start4x.elf*
-rwxr-xr-x 1 root root 793084 Apr 30 16:01 start_cd.elf*
-rwxr-xr-x 1 root root 4794472 Apr 30 16:01 start_db.elf*
-rwxr-xr-x 1 root root 2952928 Apr 30 16:01 start.elf*
-rwxr-xr-x 1 root root 3704712 Apr 30 16:01 start_x.elf*
And now we can create the mentioned files.
The first one is easy:
ck@mintp ~ $ sudo touch /mnt/ssh
ck@mintp ~ $ ls -la /mnt/ssh
-rwxr-xr-x 1 root root 0 Jun 15 11:19 /mnt/ssh
The second file, wpa_supplicant.conf needs to contain your WLAN information. I created the file using vi(m), but you can also use a text editor and then save or copy the file into the mounted boot partition:
ck@mintp ~ $ sudo vi /mnt/wpa_supplicant.conf
ck@mintp ~ $ cat /mnt/wpa_supplicant.conf
ctrl_interface=DIR=/var/run/wpa_supplicant GROUP=netdev
update_config=1
country=CH
network={
ssid="My-WLAN"
psk="passphrase"
}
Make sure you set country, ssid and psk to your own environment! The country is using a two letter country code using ISO 3166-1 standard.
Now unmount the microSD card's boot partition:
ck@mintp ~ $ sudo umount /mnt
Then eject/unplug the card from your computer and insert it back into the Raspberry Pi Zero.
Power on the Raspberry Pi Zero and it starts booting.
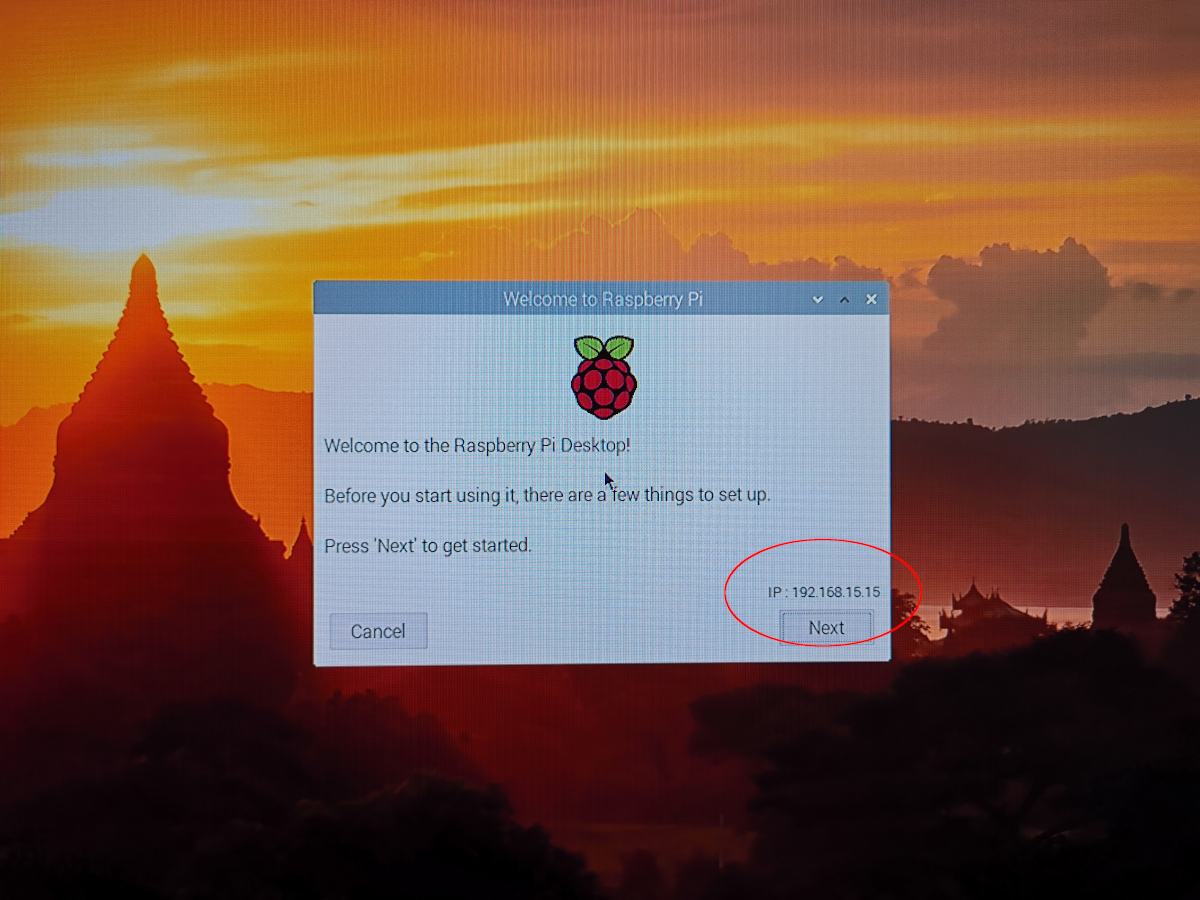
Now that the Raspberry Pi Zero has booted up again, this time it automatically connected to the WLAN and received an IP address from the DHCP server. This IP address is shown in the "Welcome to Raspberry Pi" window:
Testing SSH from my computer:
ck@mintp ~ $ ssh pi@192.168.15.15
The authenticity of host '192.168.15.15 (192.168.15.15)' can't be established.
ECDSA key fingerprint is SHA256:Wg1IpcF3NZyWOgVMP40QSGox8DxTHTGZI5IYit/z4Lg.
Are you sure you want to continue connecting (yes/no/[fingerprint])? yes
Warning: Permanently added '192.168.15.15' (ECDSA) to the list of known hosts.
pi@192.168.15.15's password:
Linux raspberrypi 5.10.17+ #1414 Fri Apr 30 13:16:27 BST 2021 armv6l
The programs included with the Debian GNU/Linux system are free software;
the exact distribution terms for each program are described in the
individual files in /usr/share/doc/*/copyright.
Debian GNU/Linux comes with ABSOLUTELY NO WARRANTY, to the extent
permitted by applicable law.
Last login: Fri May 7 16:17:53 2021
SSH is enabled and the default password for the 'pi' user has not been changed.
This is a security risk - please login as the 'pi' user and type 'passwd' to set a new password.
pi@raspberrypi:~ $
Note: Default password of the "pi" user is "raspberry"
Hurray! I'm in the OS of the Raspberry Pi Zero and can now continue with configuration and software installation - without any keyboard or mouse attached for initial configuration.
In case you prefer to watch a video of all this, there's a great and helpful video from Crazy Will Tech Show on YouTube.
No comments yet.

AI AWS Android Ansible Apache Apple Atlassian BSD Backup Bash Bluecoat CMS Chef Cloud Coding Consul Containers CouchDB DB DNS Databases Docker ELK Elasticsearch Filebeat FreeBSD Galera Git GlusterFS Grafana Graphics HAProxy HTML Hacks Hardware Icinga Influx Internet Java KVM Kibana Kodi Kubernetes LVM LXC Linux Logstash Mac Macintosh Mail MariaDB Minio MongoDB Monitoring Multimedia MySQL NFS Nagios Network Nginx OSSEC OTRS Observability Office OpenSearch PHP Perl Personal PostgreSQL PowerDNS Proxmox Proxy Python Rancher Rant Redis Roundcube SSL Samba Seafile Security Shell SmartOS Solaris Surveillance Systemd TLS Tomcat Ubuntu Unix VMware Varnish Virtualization Windows Wireless Wordpress Wyse ZFS Znuny Zoneminder