
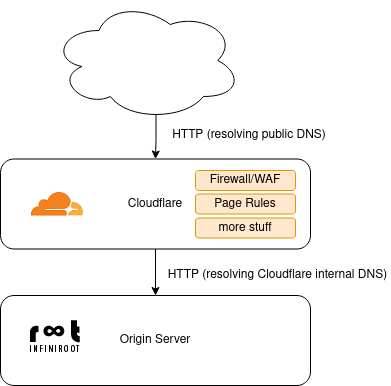
A couple of our customers use the services of Cloudflare as an intermediary reverse proxy before the web traffic hits the actual web server (called origin in Cloudflare terms) where the web application is running.
There are a couple of reasons to do that:
By default, Cloudflare shows the end-user (client) the following 502 error page when the "origin" server was not reachable:
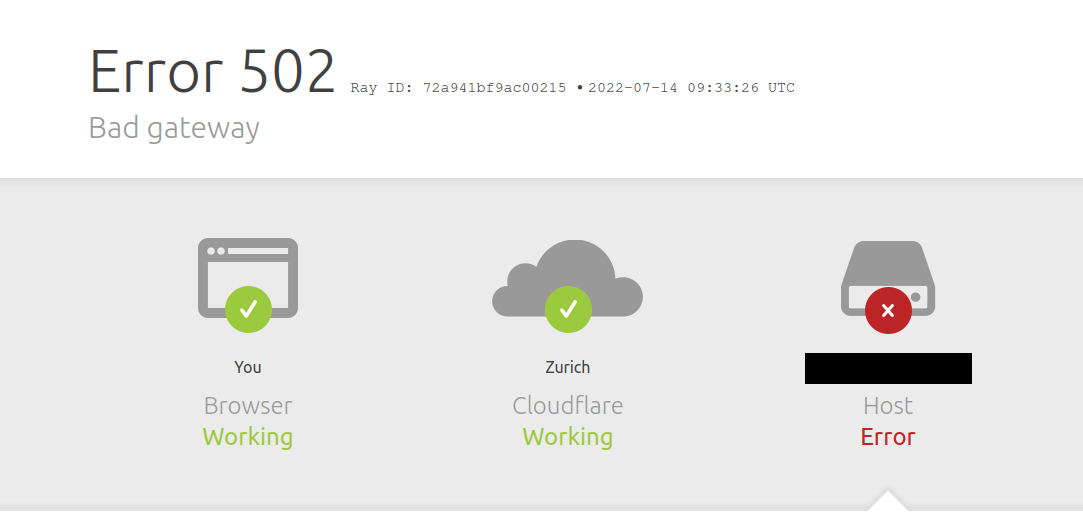
This is usually fine when the origin server is indeed unavailable. But what if there is a (scheduled) maintenance on the application and you need to show the end-users a maintenance page? And what if this maintenance happens in the application itself (for example inside a WordPress backend)? This means the application managers or developers still require access to the application while the rest of the Internet should see a generic error or maintenance page.
There is no quick and easy solution for this requirement in Cloudflare, such as a "show this page unless the request came from these IP addresses", but there is another way: Using a worker service.
The HTTP traffic to a specific URL can be routed to a "worker service". A worker service is simply explained a code executor, handling JavaScript code. Based on the written JavaScript code, certain functions are executed and this allows to alter the HTTP request or response.
Such a worker can also be created to display a static HTML page, e.g. a maintenance page. In combination with additional code checking for whitelisted IP addresses, the requirement "show a maintenance page except for..." can be created.
The "maintenance worker" can be created and just sit there idle, without being used. At the start of the maintenance, a HTTP route can be created for the application's domain, pointing to the "maintenance worker". Voilà, the maintenance page shows up - except for the IP addresses defined in the JavaScript code.

So much for the theory. The following steps show how to deploy such a maintenance worker and add the (temporary) route in Cloudflare.
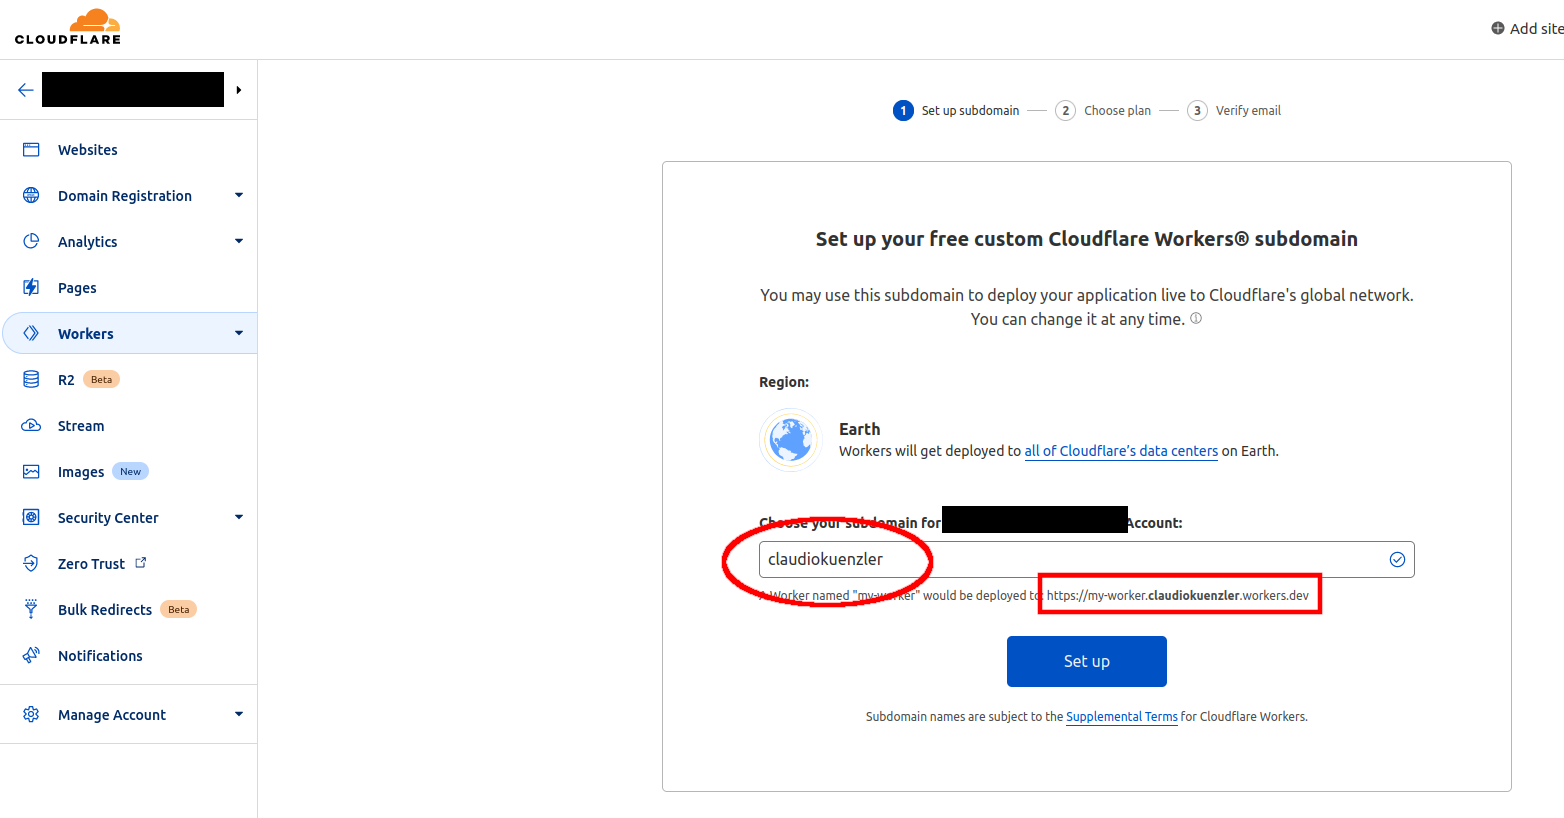
A worker service can be created under the "Workers" settings, which can be found in the global Cloudflare settings of your account (not within a selected Website). Click on "Workers" in the navigation.
For being able to create worker services, Cloudflare first asks for a specific subdomain of the workers.dev domain (worker.MYSUBDOMAIN.workers.dev). This will be used to access the different workers in the background:
Once an available sub-domain was entered, followed by a click on "Set up", the "plan" needs to be selected. For most sites the free plan should be sufficient:

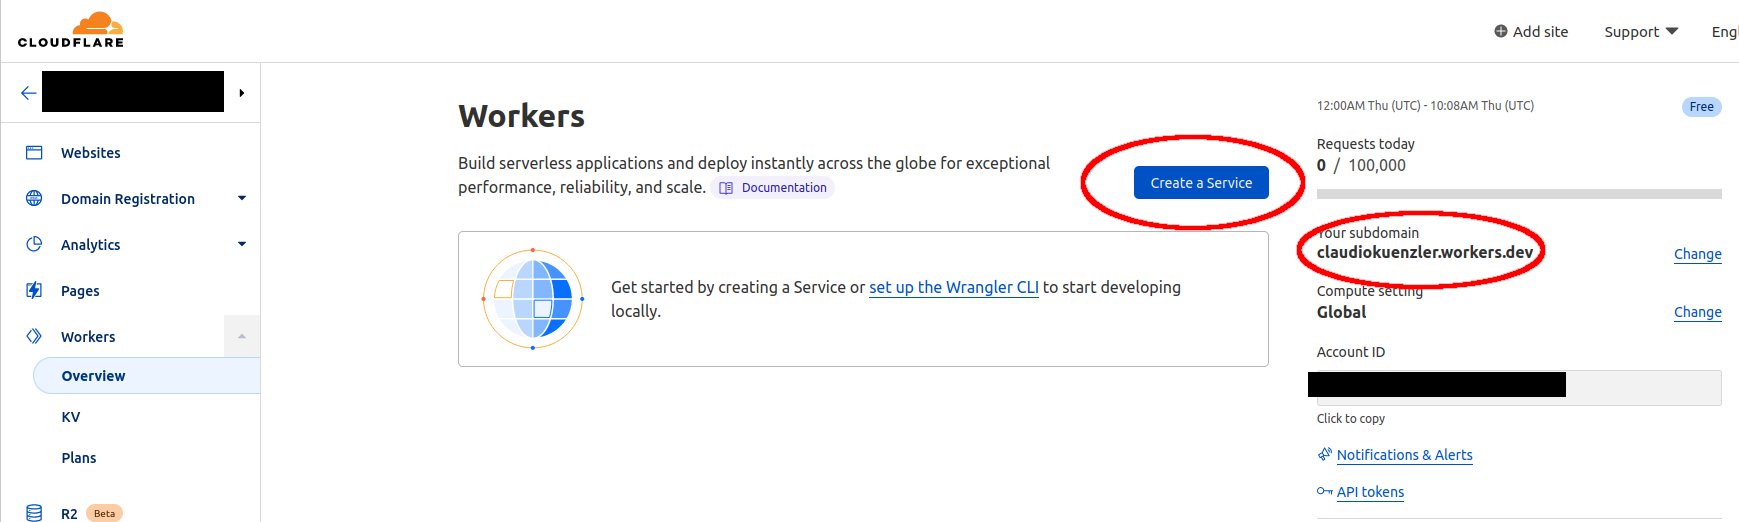
After a click on "Continue with Free" (or on "Purchase Workers Paid" if you chose that) the worker subdomain should be created. You might be redirected to a wrong page which asks again for the subdomain (it happened multiple times to us while writing this article). In this case, ignore that and click on "Workers" -> "Overview" in the navigation. The created subdomain should be displayed on the right-hand side and a new worker service can be created ("Create a Service"):
Give this new worker service a meaningful name, such as maintenance:
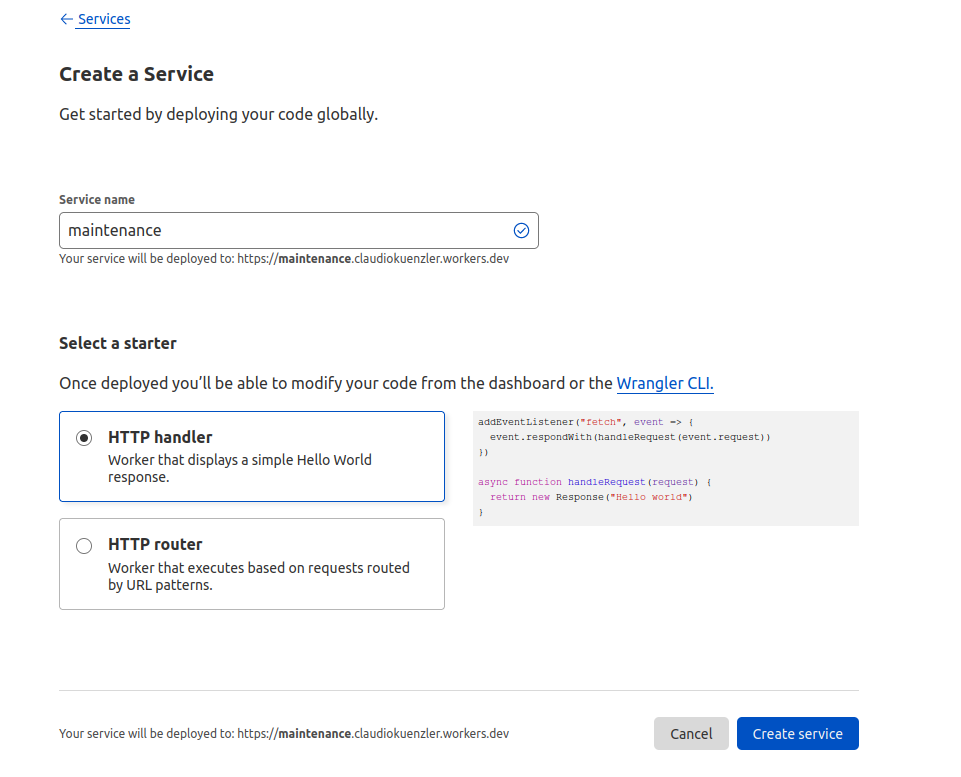
Each worker service needs to have a unique name and it will be deployed under its own domain, which is a combination of your previously selected workers.dev subdomain and the worker name.
As we want to deploy some JavaScript code, the HTTP handler should be selected (pre-selected by default). Then click on "Create Service".
The next page shows a confirmation, that the new worker service will be deployed in the next couple of minutes.
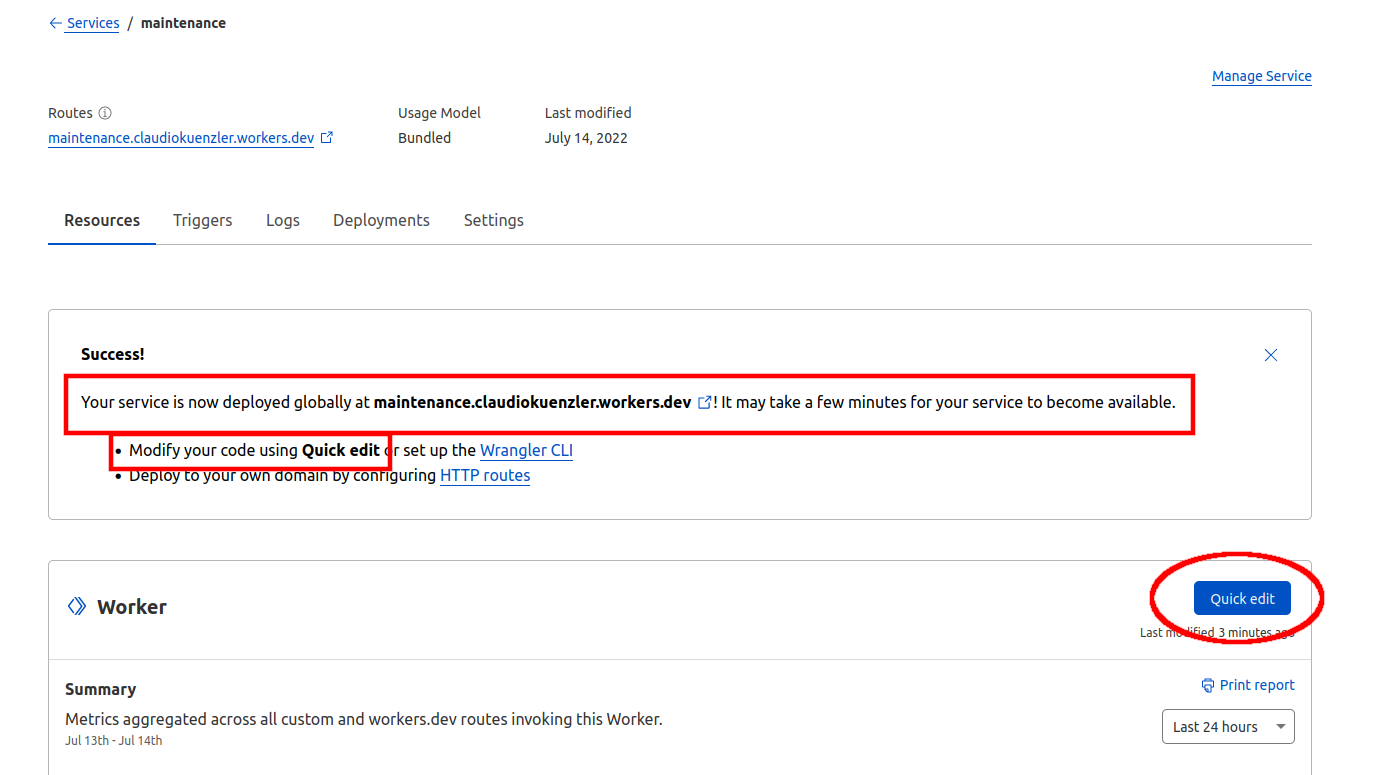
To edit the current "Hello world" JavaScript code, click on the Quick Edit button.
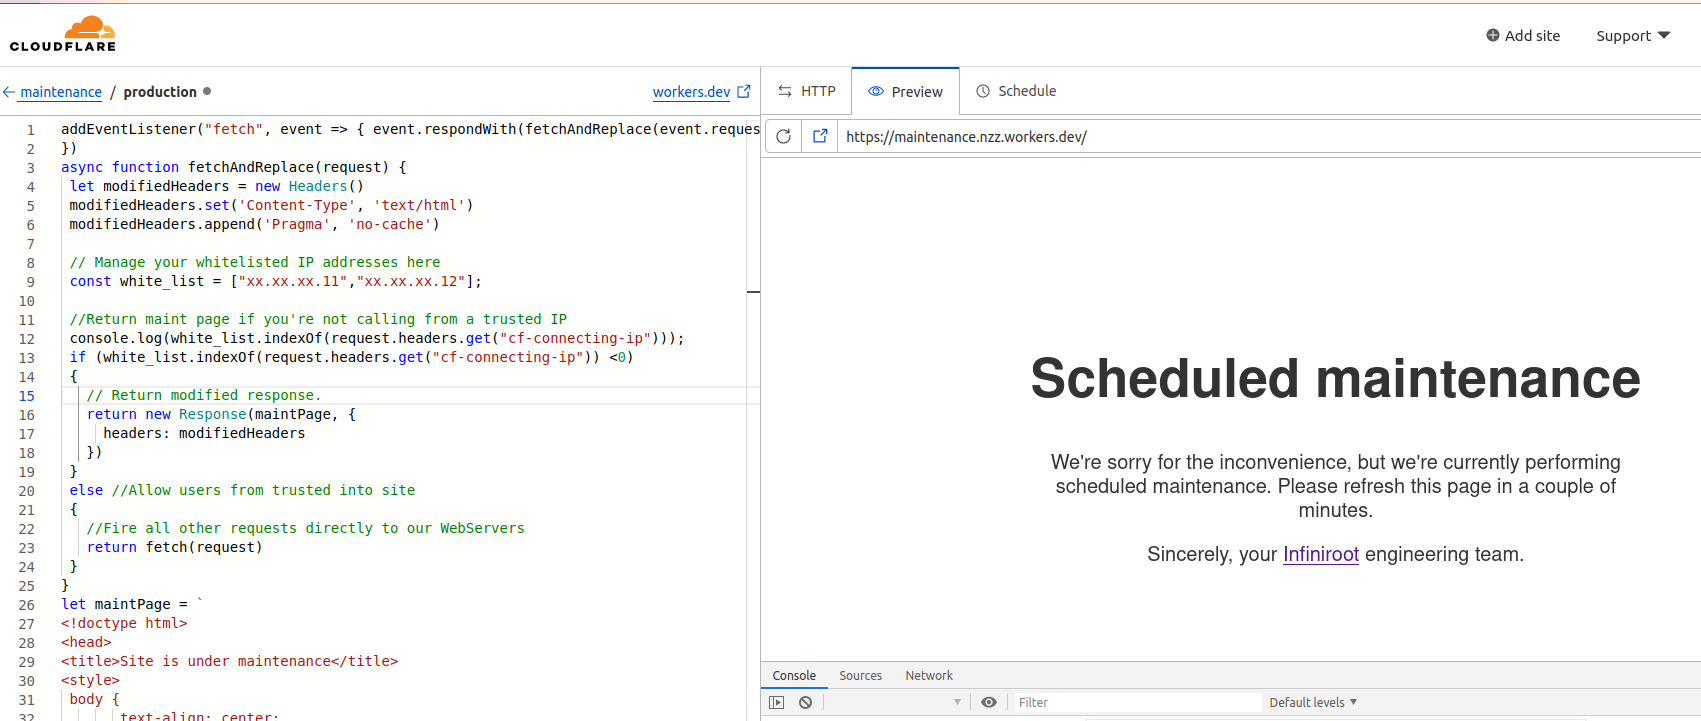
A text editor opens inside the browser, where the current "Hello world" JavaScript can be changed. Simply select and remove the current code and replace it with the following:
addEventListener("fetch", event => { event.respondWith(fetchAndReplace(event.request))
})
async function fetchAndReplace(request) {
let modifiedHeaders = new Headers()
modifiedHeaders.set('Content-Type', 'text/html')
modifiedHeaders.append('Pragma', 'no-cache')
// Manage your whitelisted IP addresses here
const white_list = ["xx.xx.xx.11","xx.xx.xx.12"];
//Return maint page if you're not calling from a trusted IP
console.log(white_list.indexOf(request.headers.get("cf-connecting-ip")));
if (white_list.indexOf(request.headers.get("cf-connecting-ip")) <0)
{
// Return modified response.
return new Response(maintPage, {
headers: modifiedHeaders
})
}
else //Allow users from trusted into site
{
//Fire all other requests directly to our WebServers
return fetch(request)
}
}
let maintPage = `
<!doctype html>
<head>
<title>Site is under maintenance</title>
<style>
body {
text-align: center;
padding: 150px;
}
.content {
background-color: rgba(255, 255, 255, 0.75);
background-size: 100%;
color: inherit;
padding-top: 1px;
padding-bottom: 10px;
padding-left: 100px;
padding-right: 100px;
border-radius: 15px;
}
h1 { font-size: 40pt;}
body { font: 20px Helvetica, sans-serif; color: #333; }
article { display: block; text-align: left; width: 75%; margin: 0 auto; }
a:hover { color: #333; text-decoration: none; }
</style>
</head>
<body>
<div class="background">
<div class="content">
<h1>Scheduled maintenance</h1>
<p>We're sorry for the inconvenience, but we're currently performing scheduled maintenance. Please refresh this page in a couple of minutes.</p>
<p>Sincerely, your <a href="https://www.infiniroot.com">Infiniroot</a> engineering team.</p>
</div>
</div>
</body>
`;
Note: This is a slightly adjusted JavaScript snippet found here and here.
By adjusting the white_list array, multiple IP addresses can be entered. As the code shows, client IP addresses (retrieved with request.headers.get("cf-connecting-ip")) which are not in the white_list array, will be shown the static HTML output (maintPage). The white listed IP addresses are allowed to connect through to the origin server (using fetch).
By using the "Preview" tab on the right side, a preview can be seen, how the maintenance page would look like:
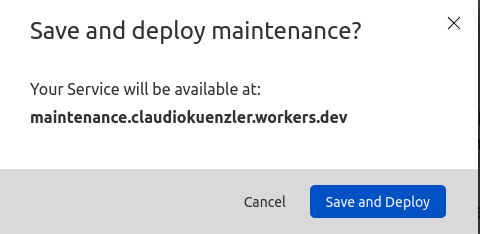
Finally click on the "Save and Deploy" button to deploy this code to the "maintenance" worker service.
Now with the "maintenance" worker ready, we just need to tell Cloudflare to start using this worker on requests to the application.
The day and hour has come: Maintenance of your application should start. This is when you select your website and click on Workers in the navigation (this time under the website settings!).
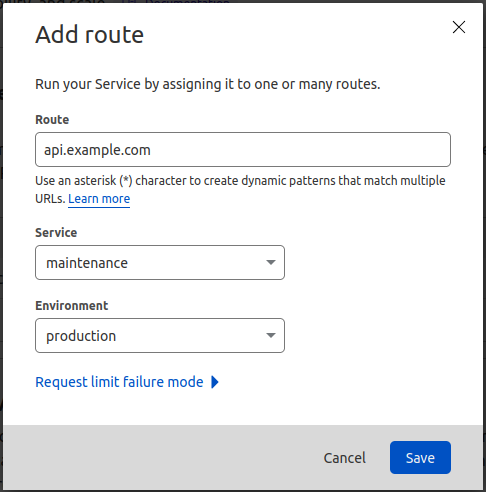
Besides listing the existing HTTP Routes, a new route can be added by clicking on the "Add route" button:

A surprisingly simple form will pop up. It only asks to define on which domain/URL the route should be triggered and which service to use. In this case we want the whole application domain to be put into maintenance and we want the "maintenance" service to be used:
After saving the HTTP route, new client requests will see the maintenance page, unless the client IP is part of the white list. The white listed clients are able to use the application as before, allowing to perform the maintenance tasks on the application.
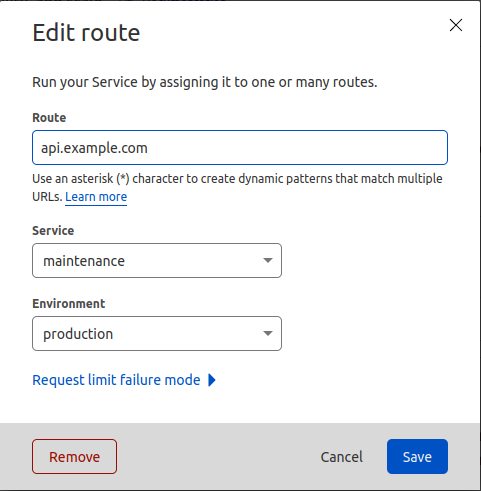
At the end of the maintenance window, which hopefully was successful, the maintenance page can be removed again by removing the HTTP route. In the list of the HTTP routes, click on the "Edit" link of the relevant route. The pop up then shows a "Remove" button at the bottom left which deletes the HTTP Route:
One would expect that showing a temporary maintenance page while still letting through administrative traffic would be an easy task in Cloudflare. But it proves to be more complex than anticipated. Yet with the "worker service" and a temporary HTTP route a very powerful (code execution) maintenance page can be created and deployed.
No comments yet.

AWS Android Ansible Apache Apple Atlassian BSD Backup Bash Bluecoat CMS Chef Cloud Coding Consul Containers CouchDB DB DNS Database Databases Docker ELK Elasticsearch Filebeat FreeBSD Galera Git GlusterFS Grafana Graphics HAProxy HTML Hacks Hardware Icinga Influx Internet Java KVM Kibana Kodi Kubernetes LVM LXC Linux Logstash Mac Macintosh Mail MariaDB Minio MongoDB Monitoring Multimedia MySQL NFS Nagios Network Nginx OSSEC OTRS Office PGSQL PHP Perl Personal PostgreSQL Postgres PowerDNS Proxmox Proxy Python Rancher Rant Redis Roundcube SSL Samba Seafile Security Shell SmartOS Solaris Surveillance Systemd TLS Tomcat Ubuntu Unix VMWare VMware Varnish Virtualization Windows Wireless Wordpress Wyse ZFS Zoneminder