
As I am evaluating alternatives for Slack as communication method, I came across Rocket.Chat. This service is available as SaaS in the Cloud but also available as self-hosted installation. The latter is a must for me, personally, as I want to know where the data (chat history for example) resides.
The installation looks pretty straightforward, but there are a couple of bugs to watch out for! In my case I've used a Debian 11 (Bullseye) as Operating System.
Rocket.Chat can be installed using three installation methods:
I decided for the manual installation as it tells me more about the internals and dependencies of an application.
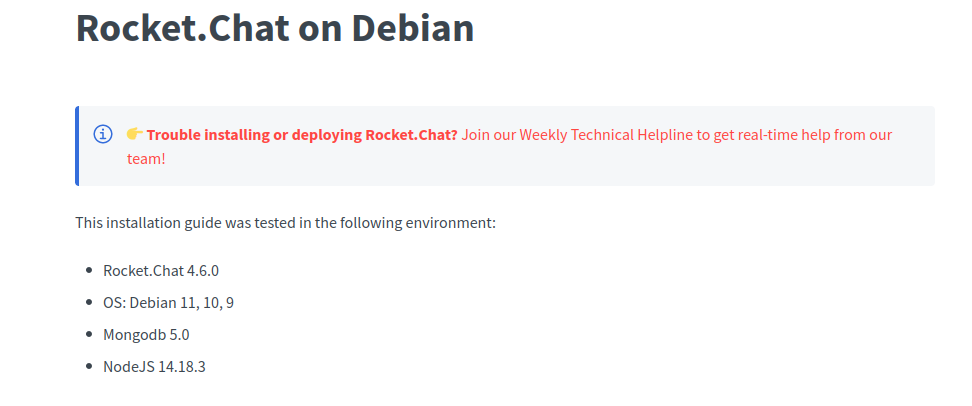
The documentation for the manual installation is pretty good and conclusive. As I am writing this blog post, the installation guide mentions the following version compatibilities/environment:
The first question mark already pops up here: Rocket.Chat 4.6.0? When looking at the Rocket.Chat releases, the newest/latest version is currently 5.4.2:
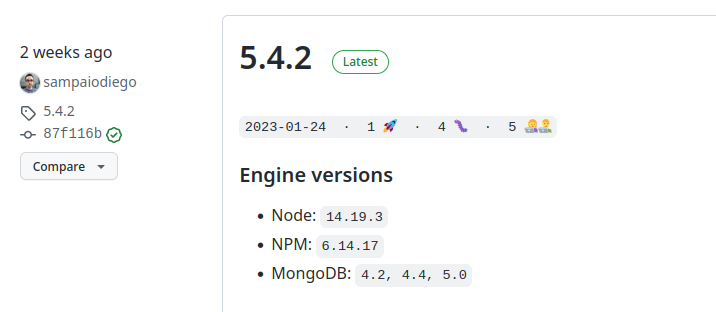
Whoa, so that installation guide hasn't been updated since April 2022 when 4.6.0 was released. Anyway, let's assume the guide is still correct and move on with the installation.
Both the installation guide and the release notes mention Node (Node JS) 14.x and NPM 6.x. The problem: These versions are outdated.
Node release 14.x is pretty old and the current LTS version is 18.x. To find earlier releases, such as the 14.x branch, you need to find the specific Node version under the previous releases downloads.
Luckily I already made my own experiences with installing a specific Node/NodeJS version on Debian, so this wouldn't take me too long. As mentioned by the Rocket.Chat 5.4.2 release notes, I downloaded and installed Node 14.19.3. Maybe newer versions would work, too, but I didn't want to risk compatibility problems at the very first Rocket.Chat installation.
root@rocketchat:~# wget https://nodejs.org/download/release/v14.19.3/node-v14.19.3-linux-x64.tar.xz
root@rocketchat:~# tar -xf node-v14.19.3-linux-x64.tar.xz
root@rocketchat:~# cd node-v14.19.3-linux-x64
root@rocketchat:~# cp -p bin/node /usr/local/bin/
root@rocketchat:~# update-alternatives --install /usr/bin/node node /usr/local/bin/node 1
root@rocketchat:~# node -v
v14.19.3
Voilà, NodeJS is now installed with the needed version.
For NPM it's a similar story: The latest version (right now) is 9.4.2 and far off the needed version of 6.14.17. However once NPM is installed (through the install.sh), a different version can be installed using the npm command:
root@rocketchat:~# curl -L https://www.npmjs.com/install.sh | sh
root@rocketchat:~# npm install -g npm@6
root@rocketchat:~# npm -v
6.14.18
Now we're off one minor release but that can be ignored.
I won't go into details here as the installation of MongoDB is well documented and straightforward. Just one advise: Do not change the default listener. Make sure MongoDB is listening on localhost only, as the default installation should be. MongoDB doesn't do authentication (by default) so keep that in mind for security. Check out some older but (some) still relevant MongoDB gotchas and security advice.
Same here, no notes to be added. The official Rocket.Chat manual installation guide tells it all. Just follow the guide and you will have a running Rocket.Chat listening on port 3000.
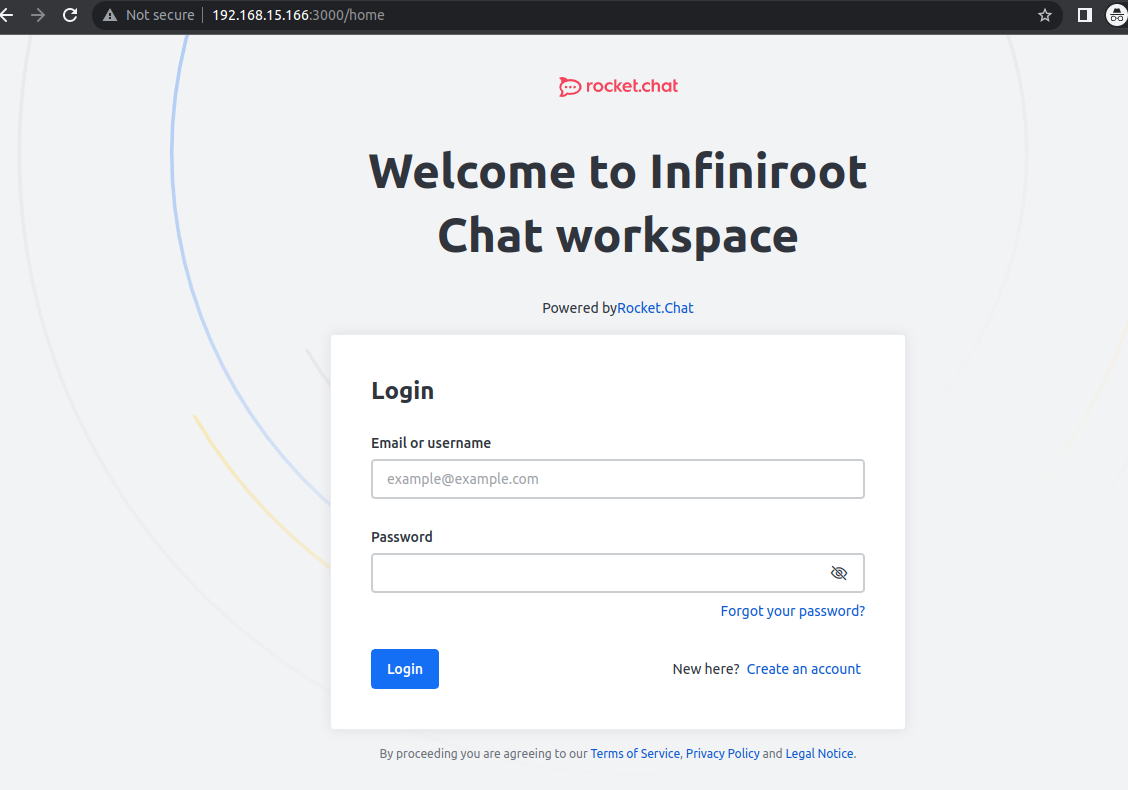
You can now use your browser and enter the IP of your server and port 3000. Note that Rocket.Chat is running on http.
Of course if you use Rocket.Chat over the Internet, the communication should be encrypted. This can be achieved by using a reverse proxy. The Rocket.Chat documentation (Configuring SSL Reverse Proxy) also covers this part.
However what could be confusing is that you need to adjust the Systemd Service Unit file once you've configured your reverse proxy. Replace the ROOT_URL with the domain configured on the reverse proxy. Also add an additional environment variable HTTP_FORWARDED_COUNT with the number of reverse proxies in front of your Rocket.Chat. In most setups this is probably 1, unless you use multiple reverse proxies.
root@rocketchat:~# cat /lib/systemd/system/rocketchat.service
[Unit]
Description=The Rocket.Chat server
After=network.target remote-fs.target nss-lookup.target nginx.service mongod.service
[Service]
#Environment=ROOT_URL=http://localhost:3000
Environment=ROOT_URL=https://chat.example.com
Environment=HTTP_FORWARDED_COUNT=1
Environment=PORT=3000
Environment=MONGO_URL=mongodb://localhost:27017/rocketchat?replicaSet=rs01
Environment=MONGO_OPLOG_URL=mongodb://localhost:27017/local?replicaSet=rs01
ExecStart=/usr/local/bin/node /opt/Rocket.Chat/main.js
StandardOutput=syslog
StandardError=syslog
SyslogIdentifier=rocketchat
User=rocketchat
[Install]
WantedBy=multi-user.target
Then restart Rocket.Chat:
root@rocketchat:~# systemctl restart rocketchat
Rocket.Chat sends out e-mails to users, for example when they register. However once Rocket.Chat was placed behind a reverse proxy, the links in the e-mail are wrong and still point to the old ROOT_URL (localhost:3000).
To fix this, you need to change the SITE_URL in the settings. In the administration go to Settings -> General and change the Site URL:

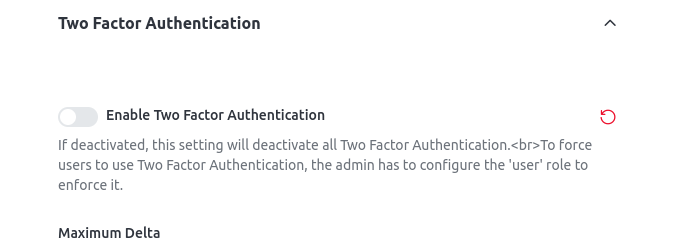
By default Rocket.Chat uses Two Factor Authentication (2FA) and sends a verification token to a new user. But the created token doesn't work and shows token expired- reason unknown.
This seems to be caused by a bug already reported a while ago (for Rocket.Chat version 4.8.1), back in July 2022.
For the evaluation phase I had to disable two factor authentication. This can be done under Settings -> Accounts -> Two Factor Authentication:
A similar problem also happens when trying to reset the password using the "Forgot your password?" link. The "token expired" error shows up when trying to reset the password and it looks like password reset has failed. The password reset has worked though and the user can log in with the new password (when 2FA is disabled).
After Rocket.Chat was initially installed through the setup assistant, your Rocket.Chat setup connects and registers itself with the Rocket.Chat Cloud. Your own Rocket.Chat installation then shows up as a "workspace".
In the Rocket.Chat administration this is called "Connectivity Services".
When trying to install an App from the Marketplace (in the Administration of your Rocket.Chat installation), no app can be installed. Instead an error shows up:
Request ID: 34ae582d-3734-4c16-b428-3b85ad82f3fd
Error Code: 264
Error: workspace is missing
This seems to be caused by a wrong registration during the setup phase. Or it could be caused by setting up a reverse proxy and therefore changing the ROOT_URL and Site URL of the chat. It is not sure what causes this problem.
This bug has been reported a long time ago (August 2021) and a lot of users have confirmed the bug to exist in several Rocket.Chat versions.
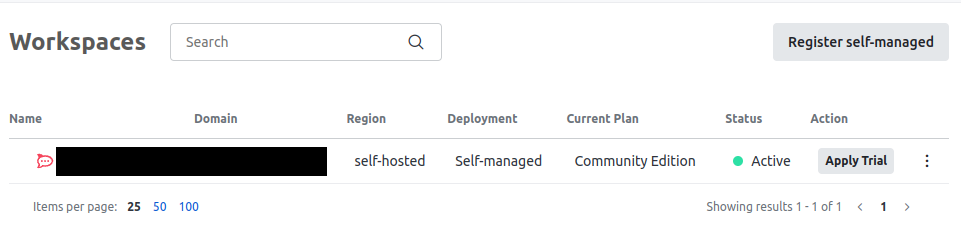
To fix this, the connectivity services need to be reset. Use the following steps:
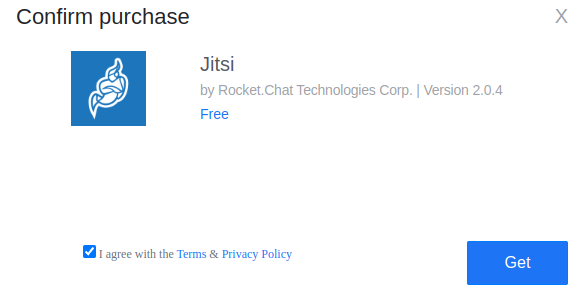
This should fix the workspace is missing bug and you should be able to install apps from the Marketplace, such as Jitsi:
No comments yet.

AI AWS Android Ansible Apache Apple Atlassian BSD Backup Bash Bluecoat CMS Chef Cloud Coding Consul Containers CouchDB DB DNS Databases Docker ELK Elasticsearch Filebeat FreeBSD Galera Git GlusterFS Grafana Graphics HAProxy HTML Hacks Hardware Icinga Influx Internet Java KVM Kibana Kodi Kubernetes LVM LXC Linux Logstash Mac Macintosh Mail MariaDB Minio MongoDB Monitoring Multimedia MySQL NFS Nagios Network Nginx OSSEC OTRS Observability Office OpenSearch PHP Perl Personal PostgreSQL PowerDNS Proxmox Proxy Python Rancher Rant Redis Roundcube SSL Samba Seafile Security Shell SmartOS Solaris Surveillance Systemd TLS Tomcat Ubuntu Unix VMware Varnish Virtualization Windows Wireless Wordpress Wyse ZFS Znuny Zoneminder