
Back in 2016 I bought a HP 250 G5 notebook, mainly for administrative tasks. Right after I received the notebook, I exchanged the 5400 rpm drive with a 7200 rpm drive. And I thought that would be enough.
But now, almost 3 years later and running Windows 10 and AntiVirus on it, it's so bloody slow it can barely be used properly - even for administrative tasks. Time to get an SSD.

To replace the 1 TB HGST 7200 rpm hard drive, I decided for a 1 TB SanDisk Ultra 3D SSD. I've made very good experiences with this SSD model so far, it's fast and it has a 5 year warranty.
Before touching anything on the hardware, I booted up a Linux Mint Live CD on the notebook.
Note: Pressing F10 right after powering up the notebook gets you into BIOS where the boot order can be changed.
The existing (internal) hard drive was detected as /dev/sda, the new SSD was attached to the notebook using an external SATA to USB adapter from Sharkoon:
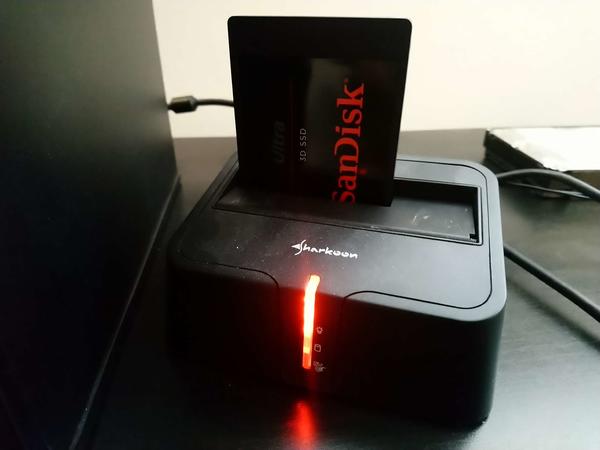
Linux detected this SSD as /dev/sdb. As the drives are exactly the same size (verified with smartctl) a full disk transfer using dd is probably the easiest (and pretty fast) method. Here a block size of 4MB was chosen (to write 4MB blocks at a time) and we transfer from the input (if) drive /dev/sda to the output (of) drive /dev/sdb:
mint ~ # time dd bs=4M if=/dev/sda of=/dev/sdb status=progress
1000203091968 bytes (1.0 TB, 932 GiB) copied, 25546.1 s, 39.2 MB/s
238467+1 records in
238467+1 records out
1000204886016 bytes (1.0 TB, 932 GiB) copied, 25577.7 s, 39.1 MB/s
real 426m17.742s
user 0m6.820s
sys 47m48.280s
The transfer rate in the first minutes were a pretty quick 140 MB/s but this quickly dropped down to around 40 MB/s, which is more or less the typical SATA 7200rpm speed. After a total of 426 minutes, the transfer was completed.
Granted, opening a notebook is not as easy and convenient as opening a desktop tower. However at the end most notebooks look the same inside and once you've successfully opened one notebook, you acquired the needed know-how for most notebooks. See also an older article CPU upgrade on a Toshiba Satellite C660D notebook (AMD V140 to Turion II), which goes into the same direction as this post.
Turn the notebook and remove the battery. Then remove all screws.
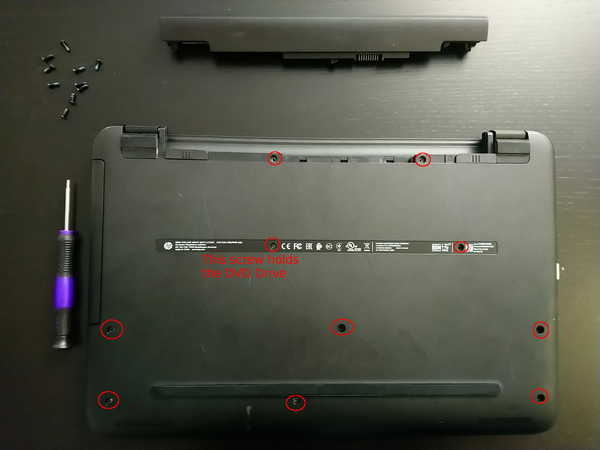
Did you remove all screws? Are you sure?
Ha! You most likely forgot two screws as they are hidden below the rubber fixers (on both sides):
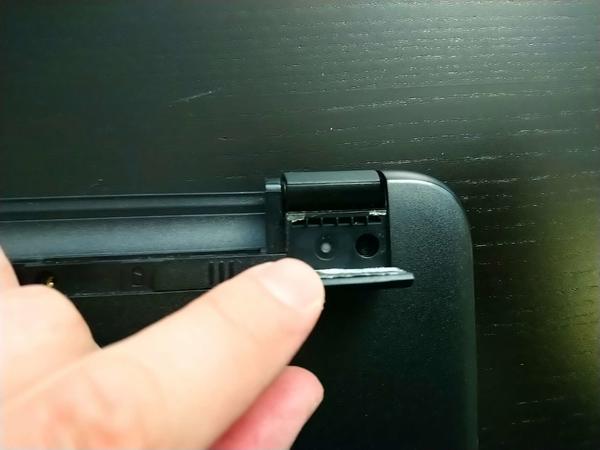
Now that you removed all the screws, pull the DVD drive out. Then turn the notebook and open the screen to a 90° angle. Gently start to lift and separate the case from the keyboard part. A helpful video how to do that can be watched on YouTube. Sometimes you need to use a bit of force.
Once you successfully opened the case, we get to see the inside of the notebook.
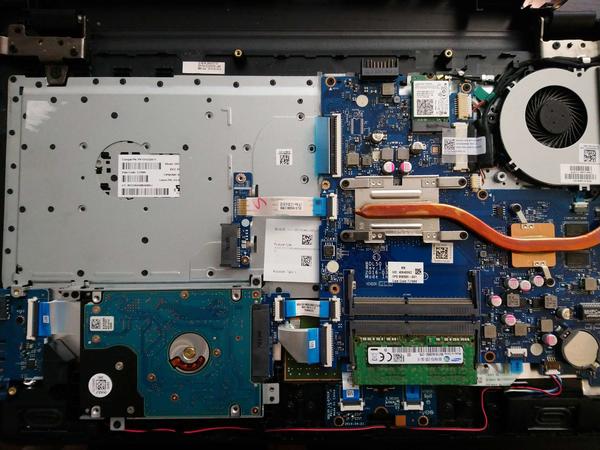
The hard drive can be seen in the left lower corner. It is fixed on the sides with four small screws:
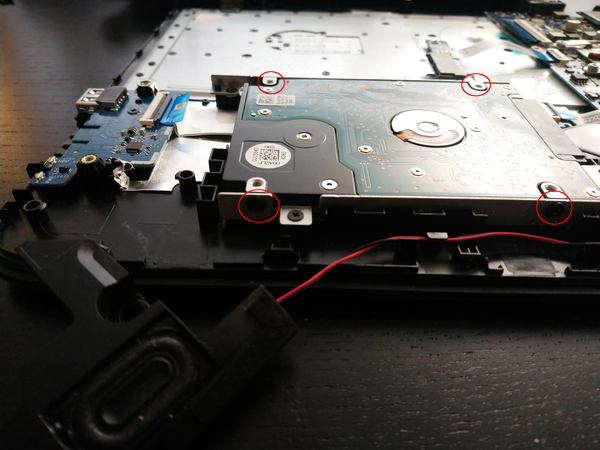
Remove these screws, gently lift the drive and then remove the SATA connector. Now the SATA connector can be connected to the SSD. Place the SSD in the same position as the HDD before and fix the screws again.
Everything backwards now: Put the case back on and fix it with the screws. Re-insert the DVD drive and the battery. Then you can power on the notebook.
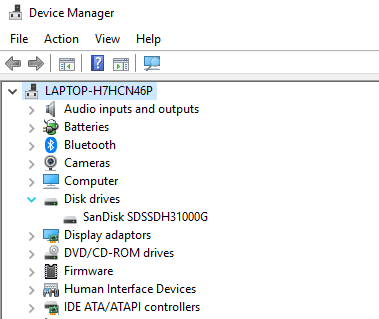
Because we made a full disk transfer using dd, all partitions and boot loader information are exactly the same as before. There is no further adjustment needed. Windows 10 booted up much quicker than with the previous HDD and the device manager correctly shows the SanDisk SSD now:
zizkovskej from wrote on Oct 22nd, 2022:
Got 2 these laptops to upgrade. Thank you for this helpful article.

AI AWS Android Ansible Apache Apple Atlassian BSD Backup Bash Bluecoat CMS Chef Cloud Coding Consul Containers CouchDB DB DNS Databases Docker ELK Elasticsearch Filebeat FreeBSD Galera Git GlusterFS Grafana Graphics HAProxy HTML Hacks Hardware Icinga Influx Internet Java KVM Kibana Kodi Kubernetes LVM LXC Linux Logstash Mac Macintosh Mail MariaDB Minio MongoDB Monitoring Multimedia MySQL NFS Nagios Network Nginx OSSEC OTRS Observability Office OpenSearch PHP Perl Personal PostgreSQL PowerDNS Proxmox Proxy Python Rancher Rant Redis Roundcube SSL Samba Seafile Security Shell SmartOS Solaris Surveillance Systemd TLS Tomcat Ubuntu Unix VMware Varnish Virtualization Windows Wireless Wordpress Wyse ZFS Znuny Zoneminder