
When using Cloudflare as a (security) reverse proxy, you protect your website from potential DDOS attacks and you hide the real web server (called origin server in Cloudflare terminology) to the public. Take a look at an earlier article to see in which situation Cloudflare could be helpful. But with the Cloudflare setup you lose control of certain aspects, such as firewall control, you'd normally have when running your own server.
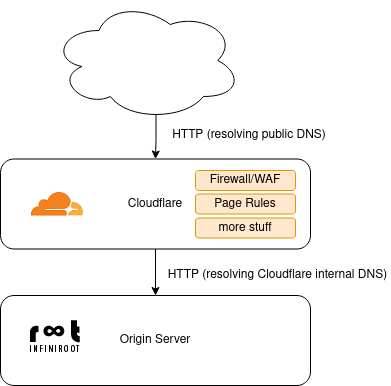
Because the HTTP traffic now runs through the Cloudflare proxy, you don't see the "real" client IP's anymore - at least not on tcp layer 4. This means if you notice abusive traffic you cannot determine the origin of the traffic. Even if you configure Cloudflare and your own server to log the forwarded (real) remote IP address, you might see this in your web server's access logs, but you can't create firewall rules; they would not be effective as the traffic comes from Cloudflare IP addresses.
Instead the traffic needs to be analyzed and blocked on Cloudflare's side. After selecting the domain in Cloudflare's dashboard, click on Analytics -> Traffic in the left navigation. This will show you the traffic graphs, including number of requests, data transfer and more.
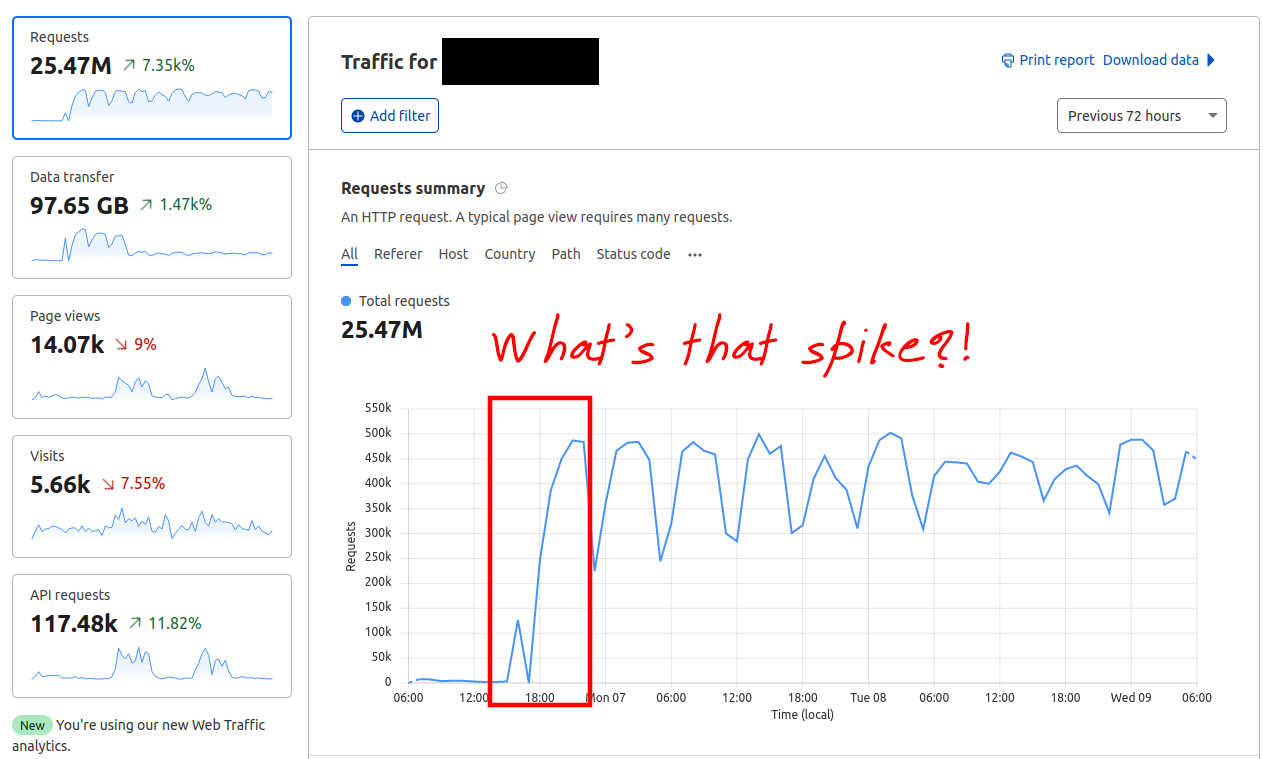
Looking at the graph (last 72 hours) quickly shows that something's off. The number of requests spiked up and remained very high, compared to the "normal" request rate.
Scrolling down further shows detailed statistics, by default the top 5 entries per category. The relevant categories in this situation are "ASNs" (registered IP ranges) and "Client IPs" to find the (top) source of the requests.
And thanks to these statistics, we quickly see a single IP as origin of all these requests:
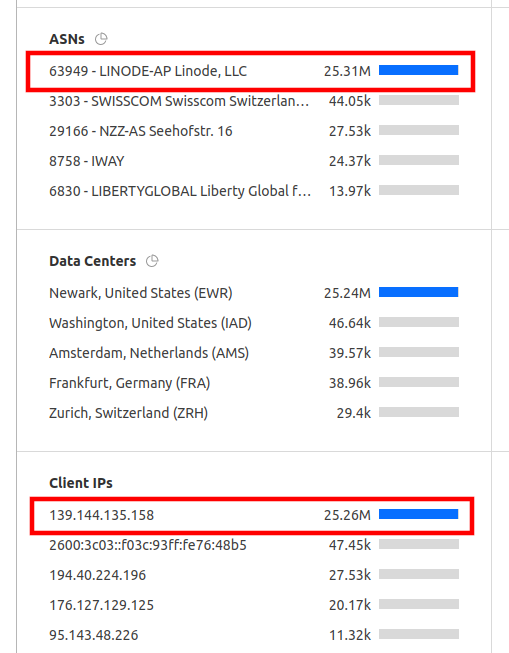
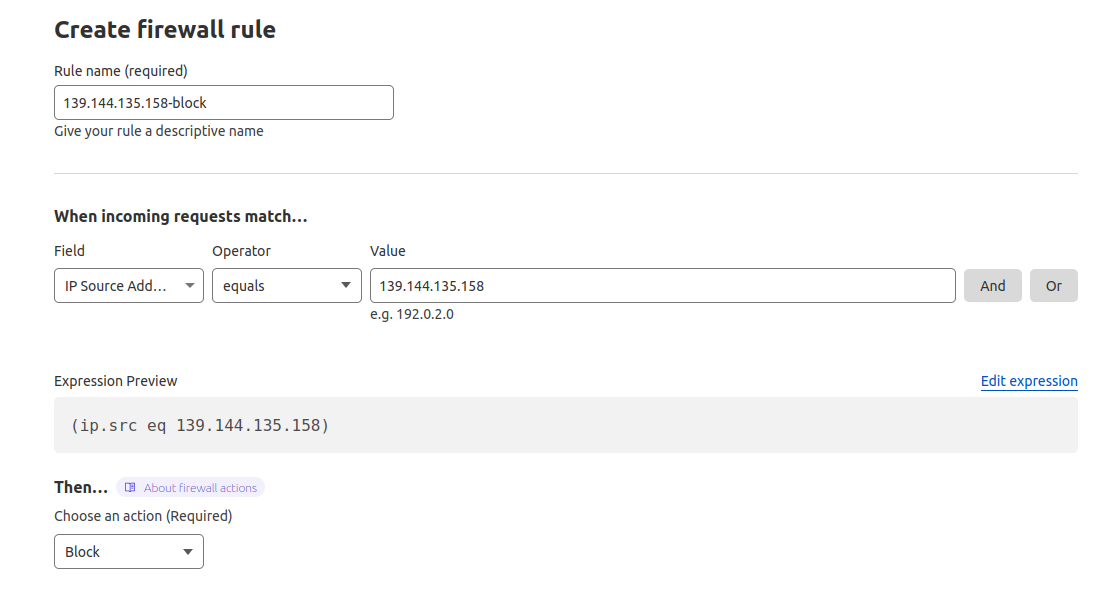
With this information we now know that the requests are coming from a single remote IP address. The requests can be blocked on Cloudflare's proxy by creating a new firewall rule. This can be done under the Security -> WAF. Then use the "Create firewall rule" button to create a new rule.
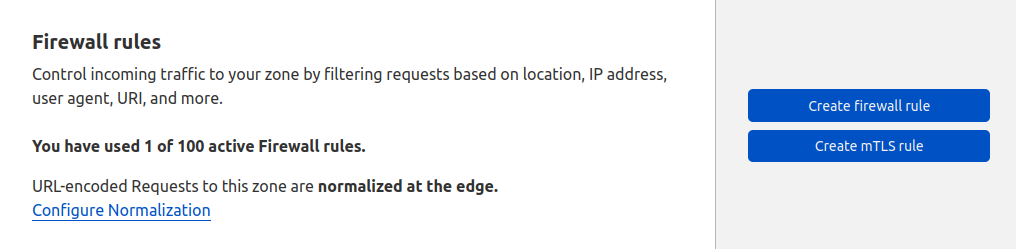
Give the rule a name (could be a description, a ticket number, etc.) and select the right field (IP Source Address in this case), the operator (equals) and the value (the IP address you want to block). Finally define the action, which is obviously block in this case.
Once the rule was created you can review and edit the rule again but more importantly you can also watch statistics and graphs. This shows you historical and real time data when this firewall rule is in effect.
Here we can see that the firewall rule is actively blocking requests from the defined client IP address:

Important: The client IP is blocked on TCP layer 7, meaning on the application layer. Requests are able to send HTTP requests to Cloudflare but then receive a HTTP 403 response. A classical firewall, such as iptables, would block the client IP on TCP layer 4, on the protocol layer, refusing to accept any HTTP request.
No comments yet.

AI AWS Android Ansible Apache Apple Atlassian BSD Backup Bash Bluecoat CMS Chef Cloud Coding Consul Containers CouchDB DB DNS Databases Docker ELK Elasticsearch Filebeat FreeBSD Galera Git GlusterFS Grafana Graphics HAProxy HTML Hacks Hardware Icinga Influx Internet Java KVM Kibana Kodi Kubernetes LVM LXC Linux Logstash Mac Macintosh Mail MariaDB Minio MongoDB Monitoring Multimedia MySQL NFS Nagios Network Nginx OSSEC OTRS Observability Office OpenSearch PHP Perl Personal PostgreSQL PowerDNS Proxmox Proxy Python Rancher Rant Redis Roundcube SSL Samba Seafile Security Shell SmartOS Solaris Surveillance Systemd TLS Tomcat Ubuntu Unix VMware Varnish Virtualization Windows Wireless Wordpress Wyse ZFS Znuny Zoneminder