
From my developer buddies (thanks Heini and Vovka!) I got to learn about Travis CI and the CI/CD possibilities.. A couple of days ago I thought it's time to implement this on the public repositories for the open source monitoring plugins and check_smart would be the first one to profit from it. Once the file .travis.yml was created...
---
sudo: required
dist: xenial
language: generic
before_install:
- sudo apt-get update -q
- sudo apt-get install -qq perl
script:
- ./check_smart.pl --help
...and Travis CI connected (authorized) on the check_smart repository, the first Travis build ran successfully:
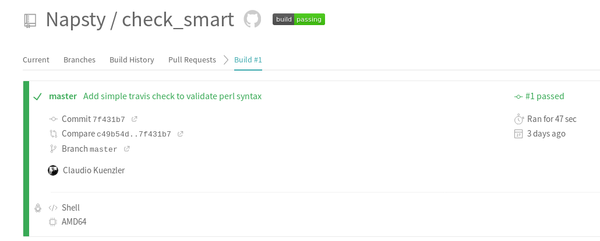
Contributions to check_smart cont now have an automated (simple) Perl syntax check! So far so good.
On the same day (lucky charm!) I came across a Tweet by Alex Ellis that Travis had stopped working:
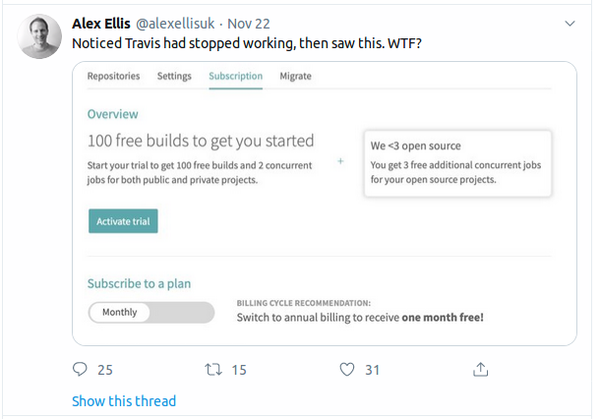
I verified this and indeed: It seems that the first 100 Travis builds are free, then Travis won't run on this repository anymore unless a paid subscription was selected. Wow, I really picked the wrong date to start with Travis. Bummer!!!!
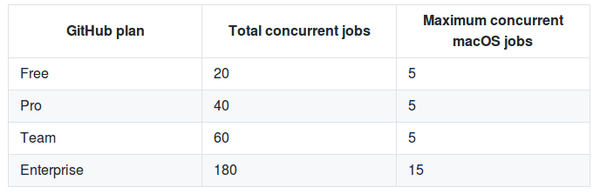
Would Github actions maybe help in this case? At least the available subscription seem to be more suitable for small open source projects like the monitoring plugins I maintain:
However Github actions are pretty new and there are not a lot of blog posts or howtos available. The official help exists and helps a little, but imho fails to explain with simple examples how actions can be setup. A post on itnext.io was (so far) the best introduction how actions can be defined.
But if I learned something essential in my last 20 years of doing IT it's this: Learning by doing and try'n'err! So better just try it out.
To start with Github actions, the subfolders .github/workflows need to be created within the repository. Inside this subfolder reside the workflows files. These are basically configuration files telling Github what to do. All these files follow the YAML syntax. The name of the workflow file(s) do(es)n't matter, all of them are being considered.This means you can create multiple workflows. Here's a simple workload I wrote which does exactly the same as the Travis yaml above:
$ cat .github/workflows/launchhelp.yml
# @file launchhelp.yml
---
name: Launch help
# Trigger the workflow on push or pull request
on: [push, pull_request]
jobs:
validate:
runs-on: ubuntu-latest
steps:
- uses: actions/checkout@v1
- name: Install perl
run: |
sudo apt-get install -qq -yy perl
- name: Launch script with --help
run: |
./check_smart.pl --help
Taking the file apart and trying to explain each part:
# @file launchhelp.yml
---
name: Launch help
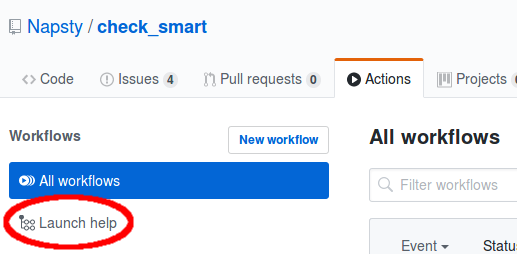
Every workflow starts with a name: In this case the workflow's name was defined as "Launch help". This workflow will show up with its name on the Github UI:
# Trigger the workflow on push or pull request
on: [push, pull_request]
The on context defines on which repository event the workflow should be launched by Github. Either one or more events can be defined. In this case I wanted an automated launch of the workflow on every repo push and on every created pull_request. There are other events, too. It is also possible to limit the workflow to a certain branch:
# Trigger the workflow on push or pull request
on: [push, pull_request]
branches:
- master # Push and pull_request events on master branch only
This is where it gets interesting: The jobs. One or more jobs can be defined. Each job starts with a name and contains multiple steps. Each step is basically an action. An action can be included from an already existing action or own commands or scripts can be executed.
jobs:
validate:
runs-on: ubuntu-latest
steps:
- uses: actions/checkout@v1
- name: Install perl
run: |
sudo apt-get install -qq -yy perl
- name: Launch script with --help
run: |
./check_smart.pl --help
In this case one job called "validate" is defined.
runs-on defines the OS and release. Imagine this as if you had to choose a Docker image.
The first step, in this case, starts with the context uses. This tells the workload to "include" a pre-defined action called "checkout" in version (release) 1. This action pulls the whole repository and then changes the working directory into the just pulled repository.
The next step has its own defined name: "Install perl". This step uses the run action, which is basically a command on the destination OS (runs-on) to be run. In this particular case it's a simple installation of Perl using apt.
Finally the last step is called "Launch script with --help" and executes ./check_smart.pl --help . If this commands exists with an exit code of 0, the step was successful, meaning the Perl script is working (syntax wise anyway).
Voilà, a simple Perl validation now ready as Github workflow!
On Github's UI, the integration looks exactly like Travis CI with an orange dot next to the commit name (during the run). A click on the dot shows the current (or completed) status of the actions. Each job and each step can be opened to see details:
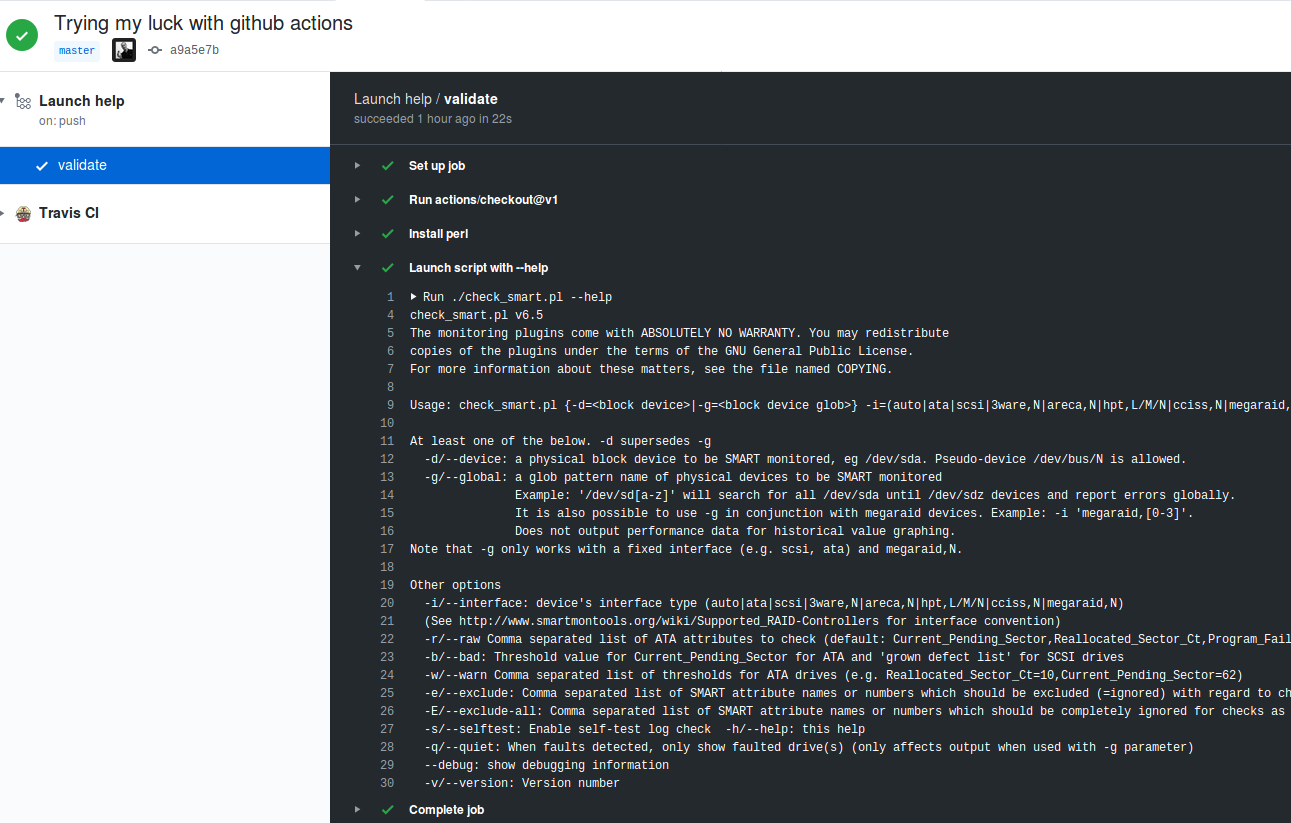
Even more interesting are obviously the failed workflows.
Starting today, November 25th 2019, check_smart now has a (simple) automated Perl syntax check. Success!
No comments yet.

AI AWS Android Ansible Apache Apple Atlassian BSD Backup Bash Bluecoat CMS Chef Cloud Coding Consul Containers CouchDB DB DNS Databases Docker ELK Elasticsearch Filebeat FreeBSD Galera Git GlusterFS Grafana Graphics HAProxy HTML Hacks Hardware Icinga Influx Internet Java KVM Kibana Kodi Kubernetes LVM LXC Linux Logstash Mac Macintosh Mail MariaDB Minio MongoDB Monitoring Multimedia MySQL NFS Nagios Network Nginx OSSEC OTRS Observability Office OpenSearch PHP Perl Personal PostgreSQL PowerDNS Proxmox Proxy Python Rancher Rant Redis Roundcube SSL Samba Seafile Security Shell SmartOS Solaris Surveillance Systemd TLS Tomcat Ubuntu Unix VMware Varnish Virtualization Windows Wireless Wordpress Wyse ZFS Znuny Zoneminder